Creatively Wrapping Gifts With Goodwill Items

Christmas is quickly approaching and this is the holiday where the crafter in me rejoices not only for the Christmas crafts I get the opportunity to create, but the opportunity to package those gifts beautifully under our tree. Goodwill can be a great place to check for, not only your gifts, but also items to creatively package those gifts in a unique way.

Yarn Embellishments- It is rare to stop at Goodwill and not see craft supplies that have been donated. Yarn is one of those inexpensive craft supplies that I love to use when packaging my gifts. Whether it is a yarn pom pom in lieu of a bow, multiple colors of yarn that have been woven together to create a unique packaging detail, or even knitted or crocheted embellishments can make beautiful gift toppers. (Image Source: Persia Lou)

Gift Card Snow Globes- Gift cards can often feel impersonal, but are often just what the recipient has asked for or needs. Package those gift cards creatively by vising the Housewares section at Goodwill and hunting for jars that can be used to create your very own gift card snow globes. Little ones can participate in the fun in creating these adorable craft. Look for small items to decorate the inside of your snow globe and spray paint those thrift store lids with a festive green or red spray paint to spruce it up. (Source: The Creative Mama)

Fabric Flowers- Visit Goodwill on the half off days or select items that are on sale that week to find material from clothing items that can be used to creatively embellish your gifts. Cut scraps of fabric to create homespun bows or cut the fabric into easy circles and create a fabric flower that can be personalized with unique buttons or costume jewelry for creatively topping them. Even items like t-shirts can be used to make elegant flowers for a unique addition to boxes or kraft paper gift bags. (Source: MomAdvice)

Book Page Rosettes- Book pages are the ultimate in frugal craft materials and are a fantastic resource for creating your very own gift toppers. With a simple pair of scissors and a little glue, you can top your gifts beautifully and inexpensively with rosettes made from book pages. (Source: Under the Table & Dreaming)

Beauty Gift Additions- Gifts of beauty items like sugar scrubs or bath salts can be a fun and thoughtful gift to give and made with materials in your pantry. I love to add a simple addition of a vintage spoon and package these items in a mason jar found at my Goodwill store. Find a jar you love, but can’t find a lid? Simple bands and jar lids can be found at your local discount store and freshen up a jar with a tired lid or be the perfect topper for a jar that might be missing one. (Source: MomAdvice)

Salt & Cinnamon Dough Toppers– Remember making simple salt dough ornaments or cinnamon-filled dough ornaments for the holidays? These are still a fun way to top gifts and can be made from some simple ingredients in your pantry. Grab a salt dough recipe here or look for the cinnamon dough recipe over here. Tie these on with scraps of fabric from Goodwill items. The best part about these toppers is that they later can be used as an ornament to adorn your tree. (Source: Simply Savannah Events)

What are some creative ways you love to package your gifts? I would love to hear from you! 

Easy DIY Halloween Costumes

It’s only a couple of short weeks until Halloween, but if you haven’t found a costume yet, have no fear! Today I want to showcase eight easy DIY Halloween Costumes you can create using items found at Goodwill. This list of easy DIY Halloween Costumes will hopefully help you gather some great ideas for throwing together a great last minute costume and save you money in the process, thanks to Goodwill!

Baby Aerobics Instructor Costume

Holy cuteness! This easy baby aerobics instructer outfit looks like an easy DIY to put together and I promise, it will be a memorable costume. Create a baby headband from a goodwill t-shirt, cut the bottoms off of a pair of socks to create baby leggings, and use your baby’s onsie and leggings to complete the look. This mom created an adorable boombox out of felt to complete the look.  (via Homemade By Jill)

Book Fairy Costume 

A couple of hardback books from Goodwill can create a unique and adorable book fairy costume. Using a hot glue gun, book pages, and the covers of the books to create your fairy wings you can create an entire costume from simply rolling paper for an adorable skirt! You will love this one (via Lilliedale)

Paper Doll Costume

Short on funds for Halloween costumes this year? This paper doll costume can be created using the free template provided, poster board, and a little foam core. Add your daughter’s laciest socks and a pair of Mary Jane shoes from Goodwill and you have a real-life paper doll to trick-or-treat with. What little girl wouldn’t love that?  (via Family Fun)

Mary Poppins & Bert Couple Costume

Couple costumes can be challenging, but with few things from your closet and a little help from Goodwill, it can be easy to create your look for less. My husband & I created this costume for less than $20 and absolutely had a blast putting it together. (via MomAdvice)

Homemade Redbox Costume

I had to laugh at this adorable Redbox costume that this family created! The Redbox costume was created using spray paint, a box, and snagging some of the Redbox images from Google. I absolutely love this idea and it cost the family less than $5 to create. The best part is that the whole family can jump in on the creating (Coolest Homemade Costumes)

Baby Cabbage Patch Doll

Looking for a costume that can work around pushing your baby in a stroller? This Cabbage Patch Doll costume is simply genius and wouldn’t cost a lot to create. Head to Goodwill to grab a green fitted sheet to cover your stroller, create the Cabbage Patch box, and then cover your baby in yarn pigtails. (Via Costume Works)

Will Work 4 Candy Costume

The best part about the, “Will Work 4 Candy Costume,” is that you need not buy any supplies at all to create this look. Paint a beard on your child’s face, dress them in their most tired looking play clothes, mismatch their shoes,  and add a cardboard sign from your recycle bin. (via Coolest Homemade Costumes)

Child’s Superman Costume

Leading a double life can be tough, but it doesn’t need to be expensive. Head to Goodwill to pick up a tie, shirt, and heavy glasses for Clark Kent, and dress him in a Superman shirt underneath. This costume is adorable and affordable! (Via Think Geek)

What is the best DIY Halloween costume you have created? Feel free to share your links and ideas below!

Throw a Board Game Party With Goodwill

I am so excited to share with you today some easy craft projects you can do to create a beautiful board game party theme for a fun game night with your friends.

I recently hosted a board game party and created all of my fun decorations from supplies I found at our local Goodwill and the dollar store. The total cost spent on all of these decorations was a mere $30 and I am so proud of how this theme turned out.

I hit our local Goodwill on a half off sale day to score these three vintage board games for a total of $2.44 (for all three)! What a steal!

The first thing I did with my supplies was to create a board game banner to edge my party table. For this you will need board game paper cards, a deck of cards (optional), play money, extra wide bias tape (I found this at Michael’s craft store in the sewing supplies), and a hot glue gun with glue sticks.

Using your hot glue gun, add two drops of glue on each side of the front of your board game piece and secure it to the inside front of the bias tape. For the reverse, add one drop of glue and then secure again to the opposite inside of the bias tape. Repeat this in a sequencing pattern all down your banner.

I decided to create two of these, one to edge my table and one above my table on my ledge. To secure it to your table, just use safety pins or straight pins to pin it to your tablecloth. Isn’t that the cutest?

I had a lot of food to serve and not a lot of platters to use. Good thing we have those board games, right? At Goodwill, pick up three clear glass candlesticks in the same size. If you can’t find them there, you can grab them at the dollar store. Using a primary spray paint color, spray paint these with your favorite color. Let them dry for an hour.

Clean off your board game with a Clorox wipe (we will be serving food on it). Invert your candlesticks upside down because we want the wide side of the candlestick to secure to the board game to create a more stable surface. On that side, apply your hot glue all along the edge and secure it to your board game on the bottom to create a base for your serving platter. Hold it secure for a couple of minutes. Repeat this process with the two other candlesticks, creating a triangle base on the bottom of your board.

Isn’t this the cutest serving platter? By raising your food up, you will have more room to add platters below and create interesting levels to your food.

You can also use other board games without a stand to place your food on lower levels. Doesn’t that look awesome?

To add some more interest to my table, I also created hurricanes to display the smaller board game pieces. Again, you just need clear glass candlesticks or even brass ones, that are often in abundance at Goodwill. Spray paint these your favorite color and then add glass bowls or containers on top to finish them off. If you can’t find these at your store, you can also check the dollar store for small glass fishbowls and vases that can be used.

Using an epoxy glue intended for glass (I used an Elmer’s epoxy glue that I picked up from my hardware store), secure the glass bowl to the top of your candlestick (just as shown above using a hot glue gun). Fill it with you favorite vintage board game pieces from the board games you bought.

I absolutely love the vintage pieces that you can find in old board games. Just remember, these hurricanes can be reused for other parties and spray painted again in whatever your party theme colors might be.

Since I was on a spray painting frenzy and I had so many great dishes to share for this party, I also created these DIY chalkboard food label frames. You can grab the tutorial for this project as well as the recipes for all of the dishes I created for this party to replicate what was created here.

Now grab your best girlfriends, have everyone bring their favorite beverage and board game (check out this list for great games to grab at Goodwill), and have a fun board game party evening that your friends will always remember!

What happens to be your favorite board game? 

How to Make Outdoor Living a Family Priority

School is out for summer! We are so excited to finally have time to truly enjoy the outdoors over the next couple of months..  I love nothing more than lounging around in our backyard and hitting our community pool all summer long.  Indiana winters are so long and our summers here are far too short. I really try to make the most of every moment of sunshine.

Wouldn’t we all love to just lounge around in the backyard all day with our feet kicked up? While I can’t say it will be possible every day, I want to share with you a few things we have been doing to make outdoor living a priority in our home over the years.

Chores come first. 

We all love being outside and in order for me to be able to camp out with the kids in the backyard, we need to have our indoor chores accomplished. The short list for me is to unload the dishwasher, make the beds, and swipe the bathrooms. The kids have to eat their breakfast, get dressed, and tidy up their rooms and playroom. With the promise of fun and relaxation outside, we all are more motivated to do our chores inside.

Get the dinner prep done. 

After I have finished the chores, it is time to get together whatever we will be eating for dinner in the evening. Slow cooker meals are a great alternative in the summer because they don’t heat up the house and can be pulled together quickly. If you don’t have a slow cooker, Goodwill is a great place to check for this great summer tool for getting dinner on the table without heating up the house. Likewise, marinating meats or preparing meat for the grill is another way to keep the house cool and keep one step ahead of the game in mealtime prep.

Of course, anything that you can do after your grocery shopping will also give you more time to enjoy being outside. Chop up veggies and fruits for snacking on throughout the week, cook pasta for pasta salads and keep it in a food storage bag to make a yummy cold pasta salad, bake chicken for the week to dice in tortilla wraps, for cold chicken salad sandwiches, or to toss into a pasta salad. I also love to wash and chop the lettuce for the week and use it on burgers or for a light lunch for myself or a side salad with our dinner.

Take the night off completely from dinner and roast your dinner on an outdoor fire pit instead. Children will love the novelty of cooking their foods over the fire and you will love having a night off from cooking. We try to do this a couple of times a month as a fun family night tradition.

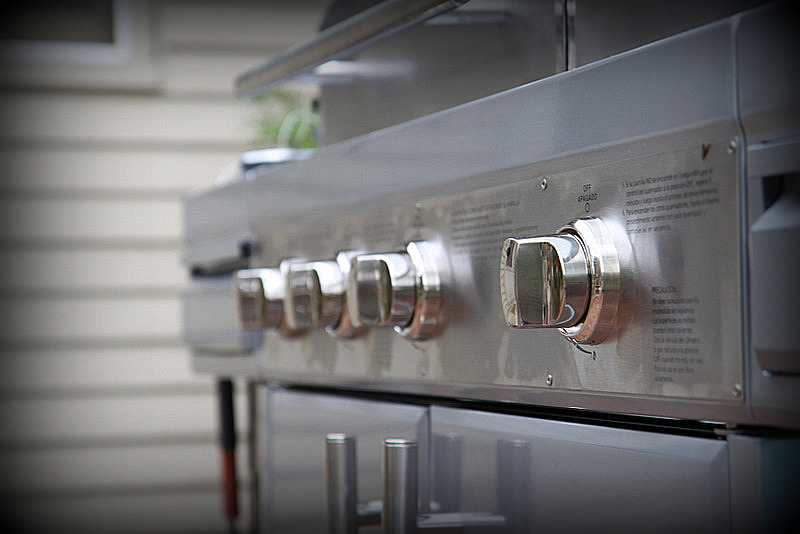
Scale back those fancy dinners and keep things simple with grilled meats, fresh veggies, and fresh fruit. Summer is not meant to be spent in a hot kitchen so get acquainted with your grill or slow cooker so you can enjoy that beautiful weather outside.

Be prepared for outdoor excursions. 

The past couple of years, I have learned to become more prepared for those unexpected outdoor adventures. On our door hangs a beach bag that is ready to go for a fun outdoor getaway. I keep sunblock, bug spray, towels, bathing suits, and a water bottle in this bag.

Check Goodwill for a great beach tote that will fit nicely into your family budget. These totes not only come in handy for your summer excursions, but can be a great way to keep your family organized all year long.

For example, in our car, we have a collapsible bag that is filled with activities for the park. I try to keep containers of bubbles, a ball, a waterproof blanket for sitting on, a Frisbee, and a lawn chair. These activities not only come in handy for when we take a trip to the park, but they also are invaluable when visiting friends who don’t have activities/toys to keep little hands busy.

Revise your homemaking schedule with the weather. Check the forecast at the beginning of the week and try to format your schedule according to the weather. If it is raining on Thursday, make Thursday your day to clean the house. If it is sunny on Tuesday, use that day to accomplish the laundry day outside and hang your clothes on the line instead. If it is sunny all week long, then accomplish chores during your child’s nap time or after they head to bed. By revising your homemaking schedule to fit the weather forecast, you can take advantage of as many beautiful days as you possibly can.

Remember they are only young once. 
Each summer, I marvel at how much my children have grown and how quickly our time together seems to be passing. I am trying to savor these moments and for me, that means slowing down our summers. While we make big plans for summer activities, I can admit that I become selfish with my time with them in the summer. The school year will begin again and we will be back to the crazy grind of school days.

Savor these moments and revise your schedule so you can enjoy each moment of them. Seek a little shade with them. Create with them. Hop in the kiddie pool with them. Indulge in homemade slushies and popcorn every single day and blame it on “the kids” and “hydration.” Be selfish with them and their time. Treasure them.

This year as they hopped off the bus on the last day of school, I whipped out silly glasses and told them that fun was the only thing this family would have on its agenda. We giggled all the way home from the bus stop. This is the stuff that makes memories.

As my husband and I say after it takes two hours to put away all the outdoor toys and clean up after the dinner, “We are making memories.”

Indeed….we are!

How do you make outdoor living a priority in your family?

Great Gifts to Give Teachers from Goodwill

As the school year draws to a close, it is a great time to think about honoring all of the hard work that your kid’s teachers have put in for your family. This past week was Teacher Appreciation Week and I couldn’t wait to deliver our fun gifts to our hardworking teachers.  Both of my children have been so blessed this school year to have teachers who love and care for them each day. It was such an honor to get to give a little love back to them for all they do.

End-of-year gifts are a thoughtful way to say thank you to your teachers who have dedicated their time to helping your children grow and learn. Here are a few of my favorite gifts to give and how you can make Goodwill a part of those gifts!

Frame a Fun Printable– Head to your local Goodwill and find a frame that you can use to frame a fun free printable for your teacher. I love to hunt for these inexpensive frames and then give them a fresh new look with a coat of spray paint.

I made these, “Raise Your Hand if You Mustache a Question,” printables for our teachers for the holidays and they loved them with spray painted red frames. They coordinate perfectly with a white thrift store mug adorned with a painted mustache.  I also really love this fabulous printable from eighteen25 that reminds the class to listen to their teachers. What teacher would not love that?

Create a Pretty Pin– This year I have become obsessed with making cute pins and have found a way to incorporate these pins on everything from bags to belts to jewelry. Teachers will love these fun accessories and it is an easy way to say thank you without spending a lot.  Pins can be created from recycled Goodwill t-shirts or you can create elegant roses from a felted Goodwill sweater or use fabric from a cute shirt you can snag on their sale rack.

Bake a Treat– One gift that I think says I truly appreciate you is spending time in the kitchen baking something special for someone you love. Visit Goodwill to find cute tins, plates, or even bake them right in the baking pans you find at your store. The best part about packaging these delicious treats with Goodwill packaging is that you don’t have to worry about getting your dishes returned back to you. I highly recommend these Dark Chocolate & Sea Salt Brownies for a treat that will knock your teacher’s socks off!  Just be prepared to have to share the recipe once they have tried them.

Give a Gift of Pampering– If there is one thing that you can find at Goodwill, it is a plethora of mason jars that can be used for all of your craft projects. Consider giving your teacher a gift to pamper herself and packaging it in a Goodwill mason jar and attach a spoon, that you can also find there.  Mix up some easy bath salts or a hand scrub that she can use to treat herself.

Give Them Something They Can Use– This year I decided to give our teachers a fun teacher supplies cake that I made with school materials I knew they might be missing in their classrooms. Check the office supplies at Goodwill to see if you can find items you can weave into a school supplies cake for your teacher. You will often find great folders, binders, and new office supplies that could easily create tiers for a cute school supplies cake to replenish their supplies for next year. Simply configure your supplies and stack them on top of each other, securing with a little packing tape to hold everything together. Half of the fun in this craft is in the creating of your cake. Adorn it with a little ribbon and a picture of your child with a thoughtful message of thanks.

What is one gift you love to create with Goodwill supplies for your teachers? We would love to hear your ideas! 

The 10 Days of Goodwill Challenge

I can’t tell you how many times I am asked if I REALLY shop at Goodwill.  The answer is always “Of Course I do!”.  I love when I am at a meeting and someone compliments me on something I am wearing, and I get to boast that I found it at Goodwill.

To prove my point…that I do shop and wear things from Goodwill…every year I institute a ’10 Days of Goodwill Challenge”.  So…are you ready?  Here we go!

 This is a cute little number I wore to the Fashion Days event at the Goodwill in Goshen.  I paired it with a nude colored crazy sassy stiletto.

Love this dress.  Banana Republic. Perfect for summer.  I put some of my style on the look by adding a brown leather braided belt and turquoise beads. I am LOVING this bright pink color with Turq accessories this season. Then I finished the look with a leather Kate Spade shoulder bag.

 Tunics, leggings and boots…all are a few of my favorite things.  I love this tunic. I think it could also be worn as a dress with flip flops in the summer. I had the boots, leggings and sweater…but those pieces would be DULLSVILLE without this great tunic!

 Wore this to speak at a ladies group at a country club.  I wanted to ‘dress the part’ for the country club (and I resisted wearing plaid golf shorts). Banana Republic white trousers and that beautiful 3/4 sleeve bright blue jacket. I played up the gold buttons on the jacket with gold accessories. 

 And what is Goodwill good for if not to pick up some great handbags?  This LV Inspired cutie I used for a night out on the town.  It is the perfect size to hold my money, ID, cell and of course…a few lipsticks!

Then I decided I needed a new wallet. Ideally I wanted something that was water proof for the lake and the beach this summer.  Well, whadda know!  Found it at Goodwill!

 Skirt and tank from Goodwill!  Love these pieces, I wear this Gap pull-on skirt a TON.  As a matter of fact, I’m wearing it now!

If you went to the Little Black Dress luncheon, then you saw me in this…and yes, it’s my new fav color combo (turquoise and bright pink).  


 This was for a working day at Goodwill.  Cute Ann Taylor flippy skirt and a black tee.  What could be better?

So I am in this “work out” phase.  Well, not as much work out as I need to get off my lazy butt and move around a little.  I don’t want to spend a lot of money on workout wear, but of course I am convinced that if I look the part, I will be in top physical shape. Basic black tank and Nike cropped workout (yoga) pants.

And for the Go Red luncheon for the American Heart Association, I had to wear red.  I emceed the Fashion Show for the event – so dressing the part was critical.  Finding a good red dress is hard!  And…guess where I found this one?  Yep – GOODWILL!

10 Unique Ideas for Projects to Do With Goodwill T-Shirts

Goodwill is one of my favorite places to visit for craft supplies and to find ideas for upcycling donated items. If you have ever been in a Goodwill store, one thing you will notice is that there is an abundance and plethora of donated t-shirts in every size, style, variety, and color.

The next time you visit your local Goodwill store, don’t just visit the t-shirts in your own size for ideas. Look in the Men’s section and in the larger sizes to find t-shirts that will offer you extra and a generous amount of craft material for the same amount of money as your smaller t-shirts. Try to select t-shirts that are not as faded or that have fabric pills on them for optimal material for your projects.

Today I wanted to share with you ten of my favorite projects that I have found to do with old t-shirts from your Goodwill store from some very amazing bloggers. I love that all of these ideas are extremely unique and that most require no sewing skills at all.

1. T-Shirt Scarves– I have seen lots of varieties of t-shirt scarves on many different blogs, but I absolutely love this DIY Dish episode you can watch to discover three different varieties of scarves you can make from an old t-shirt. My favorite is the one, pictured above, with a bright pom-pom trim.

2. T-Shirt Bibs– If you are looking for a fast sewing project that would make a fun baby gift, then these t-shirt bibs are the project for you. For little boys, you could look for their dad’s favorite sports teams and for little girls you could look for a fun t-shirt with sparkly letters or flowers. Don’t forget that these could also be embellished with rick-rack, ribbon trim, or an easy t-shirt rolled rosette flower.

3. T-Shirt Bracelets– There are many varieties of cute bracelets that I have seen using t-shirt materials, but this one has to be one of my favorites. This twisted knot bracelet can be made from just a single t-shirt or it could be made with a mix of prints or a mix of solid colors. I can’t wait to make some of these for myself and my daughter this summer. Nothing could be cozier than a gently worn t-shirt bracelet on your arm!

4. T-Shirt Produce Bag– Nothing could be greener than carrying your groceries in a cloth grocery bag…until you start using recycled materials for your bag. Even if you are a beginning sewer, this simple produce bag can easily be created for a visit to the grocery store of your local farmer’s market. I think these would be fun to make in a variety of pastel colors or to give as a gift to someone special in your life.

5. T-Shirt Pom Poms– Looking for a fun way to dress up your home for the warmer months? I absolutely love these adorable t-shirt pom poms for a fun way to add a pop of color to your mantle, as a fun adornment to a wreath, or hung in a gathering on a door handle or front door. The best part about this project is that no sewing skills are required for this one!

6. Petal Tees– I have seen many, many refashions of old t-shirts, but I think this Petal Tee is simply genius because the petal trim on this t-shirt is made from a variety of t-shirts, adding a cute pop of color for the Spring. Visit Goodwill on their half off days and stock-up on a fun mixture of colors for a fun addition of color to your wardrobe. If you are looking to add a little of the fluorescent color trend to your wardrobe, this would be a great way to do it without having to commit to an entire fluorescent piece!

7. T-Shirt Yarn– My favorite craft in the world is knitting and I love the idea of using Goodwill t-shirts to create fun yarn for my projects. This would be a fun gift to give to a friend that knits or crochets. If you can use a pair of scissors and cut in a relatively straight line, then you can do this craft and use this yarn for a variety of projects!

8. T-Shirt Aprons– I have a true affection for aprons and have a little collection of my own thrifted aprons that I have acquired from Goodwill and other antique shops. I had never thought to use t-shirts to create aprons, but I think this t-shirt apron is the cutest thing I have ever seen. This would be a cute craft to make for yourself or for your helpers in the kitchen. The best part? No ironing required and it can handle the messes that you might make in the kitchen.

9. T-Shirt Necklaces– I love t-shirt necklaces for adding a splash of color to your neckline. This rolled rosette t-shirt necklace is a fun way to add some feminine details to your outfit very inexpensively. I think it would be cute to make the t-shirt bracelet in a coordinating color and one Goodwill t-shirt should more than cover both of these cute projects.


Our tenth project is actually a fun t-shirt project we did here on the Goodwill blog. Be sure to visit my tutorial on creating a cute t-shirt flower pin made from an old t-shirt and spray painted clip-on earrings. This is so cute and would be a fun addition to a Spring top or jacket.


What are your favorite craft projects to do with old t-shirts?


All photos featured in our collage were gathered from the blogs that were featured. Please visit these blogs for tutorials and instructions on completing these projects!

Thrifty Ways to Package Holiday Gifts

I love to wrap gifts creatively for the holidays and am always on the hunt for cute ideas for embellishing gifts without spending a lot of money.

You may not have thought of Goodwill as a great place to find items for adorning those holiday gifts, but it is the perfect place to check for creative gift wrapping solutions.

Here are a few of my favorite creative ways to wrap gifts for the holidays!

Wrap it In Wallpaper- I love to hunt for wallpaper when I do my Goodwill shopping because it is such a beautiful (and durable) way to wrap your gifts. Hunt for patterns that can double for your holiday wrapping and for all of those other special occasions. I can usually find huge rolls of wallpaper for a dollar or less and it lasts me forever. You can make each gift unique by switching the colors and styles of your bows and use this paper for years to come.

Use a Wallpaper Border– Wallpaper borders are also a wonderful way to wrap your gifts, particularly for the small jewelry boxes or for recovering small gift tins. The best part about using wallpaper borders for small packages is how easy it is to work with when wrapping small boxes and it costs just quarters at Goodwill!

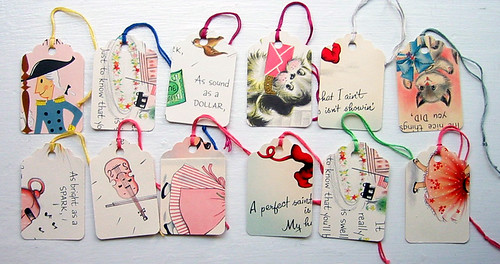
    Upcycle a Vintage Tin– Old vintage tins can make the perfect packaging for your favorite holiday treats. Recover the tops with scrapbook paper or vintage wall paper. I also love to use cans of spray paint in bold colors for making tins monochromatic.

    Wrap it in Maps– Maps can be a really unique way to wrap those gifts. When visiting in different cities and areas, be sure to pick up some maps from the visitor’s bureau and save them for wrapping your presents. To make gifts more personal, save maps from your special trips or places that you would like to remember.
    Likewise, you can save maps from the recipient’s local area and wrap them in that. Maps can also be printed for free from places like Google Maps or MapQuest.

    Wrap them in Fabric-Look at Goodwill for great fabrics to use to wrap your gifts in over by the table linens and bed linens at the store. You can easily make a no-sew bag using hot glue and the fabric. Leave the top of the bag open and tie it up with a little bit of ribbon. This would be a great way to wrap items that tend to be more difficult to wrap because of their odd shapes.

    Make the Wrapping a Gift in Itself- Don’t forget that your gift itself can also be used to wrap your present. For example, a pretty scarf can be used to wrap a new pair of gloves or an apron can be used to wrap a new dishtowel set. Look at your gifts as wrapping elements and see how you can use them.

    Add a Small Embellishment– Add a special element to finish off your gift that you have found when doing your Goodwill shopping. For Christmas, I love to find mini-ornaments to use to decorate my gifts. For other occasions, you can tie something little that goes along with the theme of the party. Be creative and it can add another dimension to your gift.

    Gifts wrapped in newspaper

    Wrap it in Newspaper- Newspaper is a great way to wrap gifts and can also be tailored to the recipient. For example, I love to wrap children’s gifts in the comics section of the paper. This is a fun and frugal way to wrap their gifts and, let’s face it; kids do not care about the expensive gift wrap anyway. Likewise, you can use different sections of the paper to go along with that person’s particular interests. For my favorite finance guy, I love to wrap the gifts in the Business section and add a Monopoly Money gift tag. Similarly, a foodie might enjoy a gift wrapped in the Food section and a whisk tied to her gift. Go nuts with the themes- it makes your gifts completely unique and more interesting to open.If you have children, have them get in on the decorating fun. Let them decorate computer paper or large sheets of construction paper to wrap your gifts in.

      vintage greeting card gift tags

    Repurpose Old Greeting Cards- Save the greeting cards that you receive and make new gift tags out of them. I save cards that I receive that have interesting pictures on them for these kinds of occasions. You can hole punch them and loop them through with ribbon or mount them to card stock and add an extra layer with stamps around it.

    What are some of your favorite ways to creatively wrap gifts? Have you found anything at Goodwill that you wrap your gifts with? I would love to hear your suggestions!


    Photo credits- Please click on the photos to access the photographer’s Flickr pages.

    Pinterest – great for Goodwill repurposing ideas!

    Have you heard of Pinterest? http://pinterest.com? According to the website:

    What is Pinterest? Pinterest is a Virtual Pinboard. Pinterest lets you organize and share all the beautiful things you find on the web.


    It is addicting.

    As I was poking around on the site the other day, I found this: http://pinterest.com/goodwillindy/goodwill-for-the-holidays/

    Some GREAT ideas on snazzing up Goodwill finds for the holidays! Check this out:


    Glitter holiday shoes!


    I am in love with this shirt, and desperately searching for someone who can sew to help me recreate this look for the holidays. Picture it with an oversized chunky fishermans sweater, sweater knit tights and boots. SO CUTE!


    And finally – don’t you LOVE LOVE this? A t-shirt quilt! What a great gift idea!

    Thanks GoodwillIndy for posting such GREAT things on Pinterest!