Repurposed Picture Frame Wreath

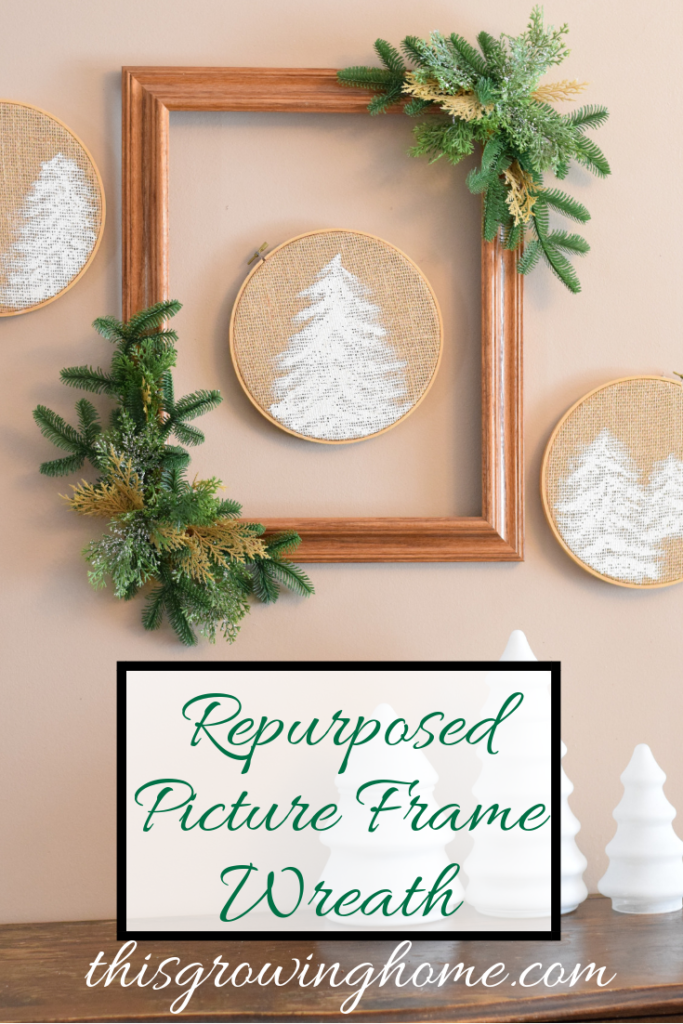
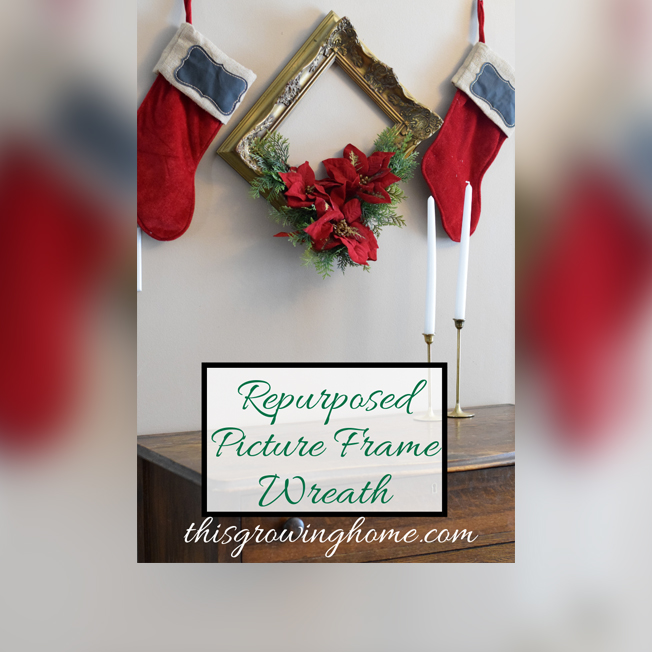
Are you ready for Christmas? This repurposed picture frame wreath is the perfect final decoration for your home, and is an easy DIY Christmas décor project using things found at Goodwill.

What you’ll need:

  1. Frames
  2. Greenery
  3. Hot Glue Gun / Glue Sticks

Supply Run!
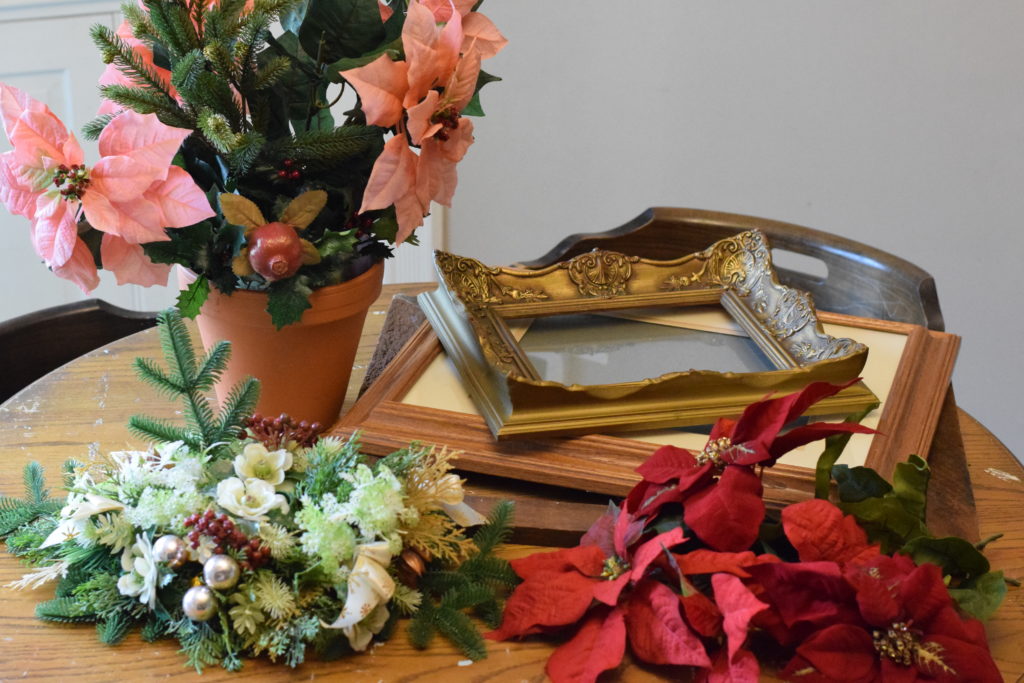
You’ll want to start out this repurposed picture frame wreath project by going on a supply run to your local Goodwill Store. They will have a ton of picture frame options for you to choose from!

Once you’ve picked out your frame or frames for this easy DIY Christmas décor project, head over to the Christmas aisle at Goodwill for some greenery. This is where you’ll need a little vision. Any donated Christmas arrangements will work as long as they can be disassembled.

Here’s What I Used

For my wreaths, I found a rustic wood frame, an elaborate gold frame, and a lighter wood frame. I also used an evergreen centerpiece, a potted poinsettia arrangement, and some red poinsettias I found on a previous trip. With those I was able to create three repurposed picture frame wreath decorations!

I preferred mine to be more minimal, and so was able to stretch the greenery farther. If you prefer a fuller look, you can easily add more to your own DIY Christmas décor project.

Pull It All Apart
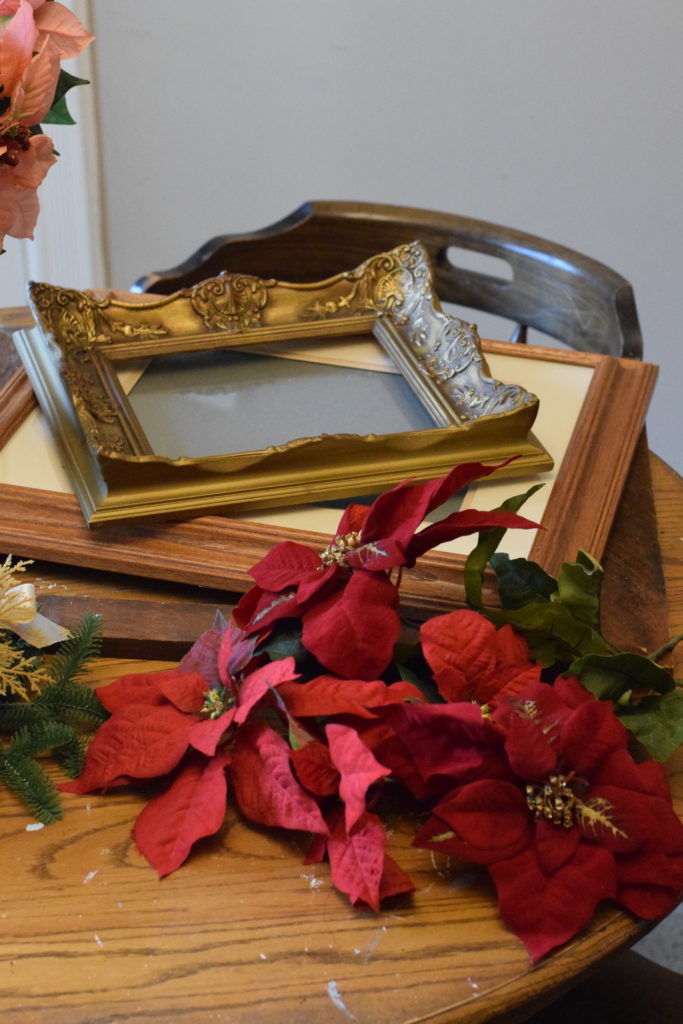
The next thing you’ll want to do for your repurposed picture frame wreath, is disassemble your supplies. Remove any pictures and glass from your frames, and separate the greenery you found.

I pulled mine apart and piled all the similar kinds together to see what I had of each. Then I organized which piles I wanted to go with each frame. Feel free to mix and match or stick to only one. Design it however you’re inspired! The beauty of this easy DIY Christmas décor project is that you can personalize it for your own preferences.

Lay It All Out
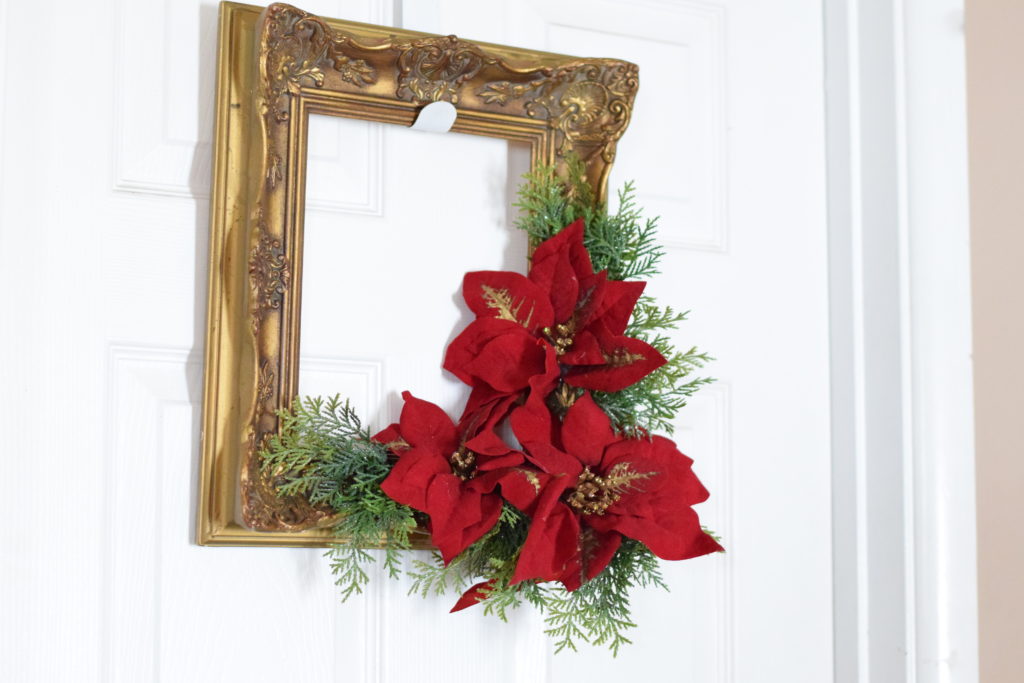
Once you’ve decided what greenery goes with each frame, you’ll want to lay it all out to make sure you have enough and perfect how it will be arranged on the frame. Find a center point that you will be working out from. For mine, I used the corner of the frame as the center point and laid it out so the greenery met at that point.

When that’s done, you can pull out the hot glue gun and get it warmed up.

Finishing Touches
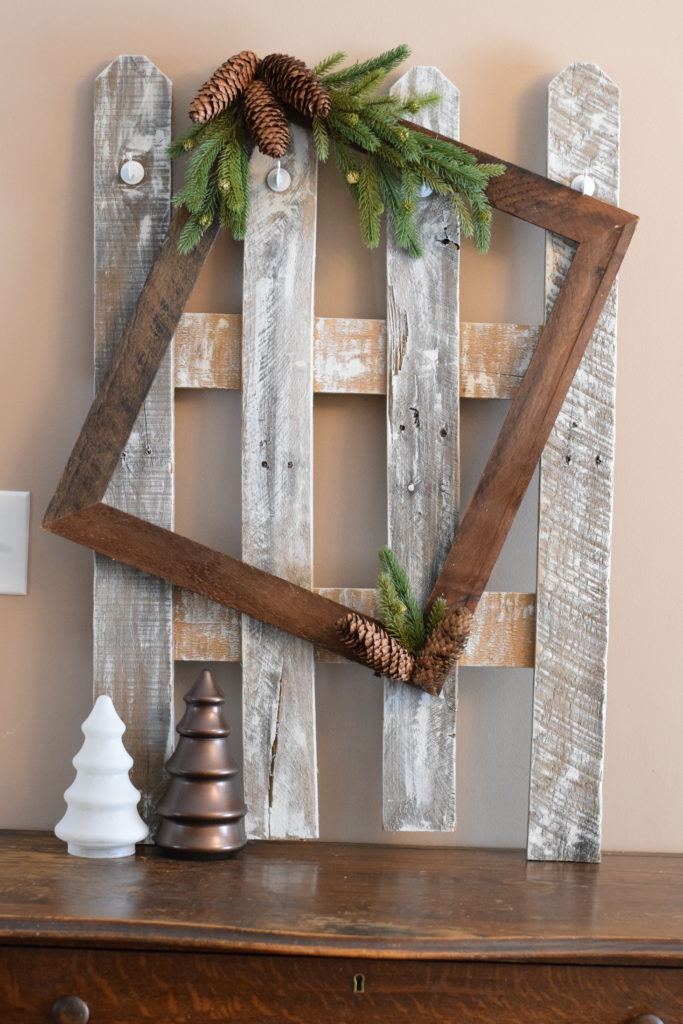
When the glue gun is all warmed up, you can start applying the greenery to your repurposed picture frame wreath. Start with the farthest greenery from the center point and work toward the center. That way, you will hide any stems or glue under the next piece. Once you get to the center, you can nest the stems and glue under pieces that are already glued down so they aren’t visible.

If you are nervous about being able to disguise the glue points, you can add your own embellishment to the center point like a ribbon or bulb. You may even have one laying around after disassembling your greenery!

Get Hanging!
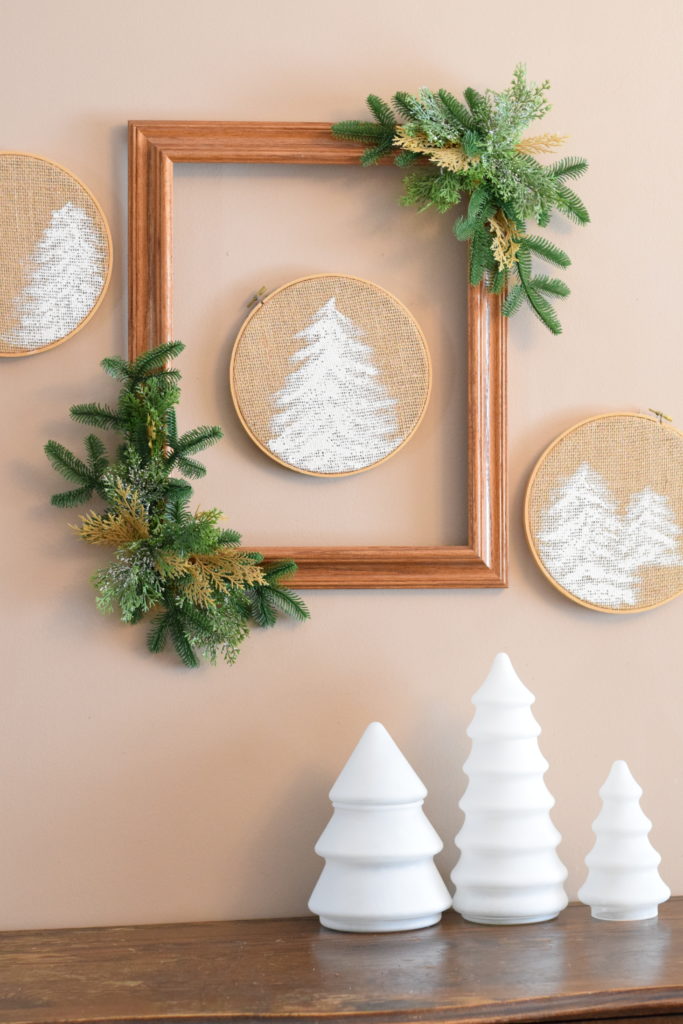
After the glue dries, your easy DIY Christmas décor is ready to be displayed! You can hang your repurposed picture frame wreath, or display it from a shelf.

I was so happy with how mine turned out! They look great on their own or as the focal point of your holiday wall arrangements! Enjoy your DIY Christmas décor pieces! You can find tutorials for the DIY Winter Décor Glass Trees and picket fence DIY Stocking Hanger on my website www.ThisGrowingHome.com

Or go directly to the posts:

https://www.thisgrowinghome.com/diy-winter-decor-glass-trees/

https://www.thisgrowinghome.com/diy-stocking-hanger/

Hopefully you enjoyed this fun and easy DIY Christmas décor project and are already getting started on your own repurposed picture frame wreath! Check in later for more fun and easy projects supplied by your local Goodwill! And… Happy Decorating!!

Models Wanted for Holiday Fashion Show!

We are looking for models again!
On Saturday, December 13, we will be hosting a
HOLIDAY GLITZ Fashion Show
at the Warsaw Goodwill Store.
We are looking for ladies that are at least
18 years of age…
all sizes and shapes! 
Interested?
Please send your contact information along with a recent photo to [email protected] 

DIY Holiday Mantel Decorating Ideas

I can’t believe that the holidays are upon us and, if you are anything like me, the house is just begging you to decorate it for the season. I love beautiful holiday decorations, but I prefer simplicity, affordability, and smart investments that can be used over and over again. In our house, for example, we are decking it out with my favorite burlap wreath and my handmade yarn trees and we are even buying our first REAL Christmas tree this year (which I am awfully excited about).

I love to make handmade items that we can pull out from year to year so that is why I am excited to showcase some DIY Holiday Mantel Decorating Ideas from some of my favorite DIY bloggers. Of course, I am going to weave in some great deals found at Goodwill this holiday season too to round these mantels out.

Add a Little Typography

I am a big fan of typography and the roots of that just might come from being married to a web designer. I love this LET IT SNOW banner from The Proper Pinwheel that you can create with just a little cardstock and some scissors. To help balance out the piece, consider adding a mirror or scrap paper covered books from Goodwill to round out the mantels. I happen to love these little silhouettes too that would be beautiful in spray painted white frames to match.

Embrace a Scandinavian Theme

There is something so sweetly simple about red and white paired together and there are so many fun elements that could be added from your local Goodwill store in this Scandinavian Red & White Mantel. From spray painted candlestick holders and accessories, to vintage ice skates, to a simple red painted door, to stockings made from sweaters…there is just so much to love about this one created by Tatertots & Jello. The addition of paper garlands and pom-poms add those perfect homemade touches.

Light It Up With Snow Globes

Even as a grown-up, I find snow globes just as beautiful and magical as I did when I was a kid. I am also a big fan of terrariums so I really love this idea of pairing the two and creating a Snow Globe Terrarium to light up your mantle. This inexpensive idea adds a lot of holiday magic and would be a fantastic craft to create with a few of your favorite holiday helpers. Check Goodwill’s houseware selections for jars to keep it budget-friendly thanks to this fun idea for Pink Pistachio!

Embrace Mixed Metallics

If there is one thing I love this year it is metallics and mixing them together. Luckily, it is easy to gussy up a vase or add a touch of paint to sticks from the backyard thanks to the metallic spray paints on the market. I love this mixed metallic mantel from Centsational Girl because it is so elegant and also looks very easy to achieve with a little spray paint or even glitter tape (as Kate did)  from your craft tool arsenal. How easy is this?

Add a Traditional Garland

Pre-made garlands can be expensive and may not have the color scheme you are after. I love a traditional mantel with evergreen garland and this tutorial recreates the Pottery Barn style at a fraction of the cost. Between Naps on the Porch illustrates one struggle that I have had with ordering garlands from PB…the length just isn’t there. You have to buy many to achieve the length you need for a decorated porch or mantel. Making these yourself gives you the flexibility to create your own desired length and add in the perfect colors to bring it all together. The best part is that you can use these year after year!

Add Chalkboard & Marquee Details

I am such a big fan of chalkboard paint and almost anything at Goodwill can be transformed into a DIY chalkboard from photo frames to mirrors to cupboard doors. I love the idea of mixing and matching words in front of your DIY chalkboard for an elegant holiday mantel! The Crafted Sparrow shows off her style with a handmade MERRY marquee that she whipped up. Consider hunting the store for a basket for snowballs and for boxes or luggage to round out a corner.

Keep It Natural

As I get older, I appreciate more a simple touch provided by nature instead of fake greenery that requires packing and storing for the season. I love this simple mini wreath garland from the merry thought that you can create to decorate a mantel created from a little pine and adding berries, pine cones, and sticks from your backyard. This mantel isn’t fussy and relies on all the beautiful things that nature provides to achieve a simple & clean modern look.

What are your favorite ways to decorate your mantel for the holidays?

8 Beautifully Frugal Valentine’s Day Projects

Valentine’s Day is just around the corner and one of my favorite things to share here on the Goodwill Tips Blog is frugal ways to celebrate the holidays using items from your local Goodwill Store. You may have thought last year’s DIY Valentine’s Day Projects post couldn’t be topped, but I think today’s projects are going to rival all that I shared last year. The best part is that they are both beautiful AND frugal- a total win for my wallet and my home!

Let’s get started with this year’s featured projects!

DIY Valentines Day Bow Tie

I am a total girly-girl so I am absolutely dying over this adorable Valentine’s Day bow tie on Plan B. You only need a few craft supplies and a men’s necktie to create this look. If a pink tie hasn’t been donated to the store, look for a red tie or anything in those festive red & pink colors. Pair this with a lacy blouse and your best boyfriend blazer for a cute night on the town.

If you can’t locate a bow tie, hunt for a red, pink, or white blouse and try my frugal DIY Rosette Necklace for an adorable addition to your favorite jewelry pieces.

DIY Coffee Cup Wrappers

I love a good free printable and am madly in love for these Valentine’s Day cup wrappers. Travel mugs are something that I often see in abundance at our local Goodwill. How sweet would this thrifted gift be with a little lovable printable on the outside and filled with their favorite coffee for someone you love, heading off their morning commute? In my mind, the ultimate sign of love is a cup of coffee, don’t you agree? Grab this free coffee sleeve printable from Eat Drink Chic today!

DIY Sequined Heart Shoe Accents

Last month we talked about how easy it is to make your own sparkled set of shoes from a pair of Goodwill shoes. To take this a step further towards Valentine’s Day festivity, check out this easy sequined heart shoe accent you can make from At The Picket Fence. I know I have one adorable little girl who would absolutely love this heart accent and it would be a fun & inexpensive craft we could do together too!

DIY Coloring Page Valentine’s Day Printables

I am all about free printables for celebrating the holidays and am madly in love with this, “I Love Everything About You,” printable from Tried & True for a couple of different reasons. Besides this printable being free, it is actually a coloring page that you can fill in with your own favorite colors or you can have your kids do for a fun Valentine’s Day activity.

Just pick up a frame or clipboard for displaying these, from your Goodwill store, and you will have something beautiful to decorate a wall, mantle, or nightstand.

DIY LOVE Planter

One donated item that I always can easily find at my Goodwill store is an abundance of white mugs. When I see these, I immediately snap them up because there is so much you can do with these $.25 wonders.

If you are looking for a fun way to add a little festivity to your home, add a LOVE splash by using one of those mugs as an adorable planter for the Valentine’s Day season. Not only is this a cute addition to your home, but would make a fantastic last-minute gift for someone you love! Check out Lacquer & Linen and this easy tutorial for this fun DIY LOVE planter!

DIY Big Bow Pillowcases

Although I don’t sew, I know many of you do, and I truly admire you! For those of our readers that do have the sewing gene (you, lucky people, you!) here is a fun tutorial from raegun ramblings for how to create your very own DIY Big Bow Pillowcases to add a little festivity to your home. 
To create these, visit your local Goodwill Store and purchase linens, sheets,  or the largest shirts you can find in your favorite festive colors. Use this material to create your own pillowcase covers for Valentine’s Day.

DIY Valentine’s Day Centerpiece

If you are looking to add a little festivity to your dinner table or mantle, you will love this easy project created from a little vinyl and any type of glass item/jar that you can find at your local Goodwill store.  
One Artsy Mama offers this free downloadable heart image that you can use to create your own vinyl masterpiece for your table. Fill your jar with festive conversation hearts and you have a fun & frugal centerpiece that you can use every year!

DIY Heart Sleeve Detail

I have been known to wear my heart on my sleeve so this project is perfect for a girl like me! Just visit your local Goodwill for a shirt, cardigan, or sweater you can add your heartfelt detail on  and use these easy directions from hey love designs for creating an easy felt detail to your sweater.

This would be a fun one for a little girl in your life too and takes minimal sewing skills (yay, for those of us that dropped out of sewing school!) to make this sweet little project!

Happy Valentine’s Day, everyone!

Holiday Looks for Less

As I sit here in my office, looking at my event calendar for the month of December, I’m wondering how in the world I am going to be able to find amazing holiday outfits to fit all of these events.  Everything from an office cocktail party to a girls luncheon and a dinner dance. 
Rather than making the mistake most of us do this time of the year (run off and buy a few new outfits that we will wear one maybe two times), I decided to head to Goodwill and see what I could find.  First, I settled on a color: RED!  
Here is how I styled this amazing red dress, 3 ways to meet all of my holiday event needs.
THE RED DRESS – one holiday dress, 3ways
Holiday Gathering with friends-The first look I found a great vintage tapestry bag and made that the statement of this look.  With understated jewelery and boots the handbag pops! Since this event is a casual one, I grabbed a denim jacket to finish the look.

Dress:  Goodwill
Jacket: from my closet
Boots: won in a Facebook Contest
Handbag: Goodwill
Necklace: Stella and Dot
 

Office Party – Sophisticated and chic was what I was going for in this look.  I paired the red dress with a textured tight (these have a subtle stripe) and shoe-boot, a necklace with a lot of sparkle and finished the look with a scarf with some sequin detail on the ends.

Dress:  Goodwill
Scarf: Goodwill
Handbag: from my closet
Tights: from Target
Shoes: from my closet
Necklace: Stella and Dot
Bracelet: local boutique ($10)
 
Dinner Party with Dancing  – Finally, I needed something that I could wear to a dinner dance.  I changed the neutral in the outfit from black to gold.  My gold sparkly shoes are perfect for dancing.  When I added a gold statement necklace, layers of gold bangle bracelets and the vintage designer handbag…I was set!  I also threw on an amazing vintage fur jacket to finish the look.  Of course…from Goodwill!

Dress:  Goodwill
Handbag: Goodwill
Shoes: from my closet
Necklace and Bracelet: Stella and Dot

Of course to further change the look of this dress, change the belt!  In the first look try a thick black belt or a braided one.  For the second, try something with some shimmer.  And for the third try a gold chain belt.
 
STAY TUNED!
Stay tuned to this blog for some great ideas on how to add a little sparkle to your New Years outfit!

NEW YEARS RESOLUTION #1

NEW YEARS RESOLUTION #1
get all the holiday décor dealt with before February. 


New Years Day. What does it mean to you? For me, it means cleaning and organizing. Putting away all the holiday décor and getting my house back in order. And for some reason that task seems to get harder and harder each year.

My goal is simple: get my home to a Christmas-decoration-free zone. Inevitably as I started going through things, I get side tracked and unmotivated.  This year it occurred to me ‘why don’t I eliminate some of this holiday clutter and donate it to Goodwill’. BRILLANT! 

Imagine being able to just load up your holiday stuff into your car, and not dealing with the organizing / reorganizing! Then, next year head to your local Goodwill store and load up on new holiday decorations. Seriously…I might be on to something here! 

3 EASY STEPS

Here are some tips when considering eliminating your holiday clutter:

1. Before you start undoing all of your beautifully staged holiday decor, go through the storage totes and consider what you didn’t use.  Do you really NEED those things? Can they be donated?

2. Then, as you put things away, think about it’s meaning.  Of course you don’t want to donate those sentimental ornament that your daughter made for you in 3rd grade, so before you repack your ornaments, have 2 piles “keep” and “donate”. Put things in the ‘donate’ pile that you may not like, you haven’t used or simply want to replace next year.

3.  Keep a list of those things you’ve decided to completely replace next year. Nothing could be worse than next December, getting all into the holiday spirit and decorating and realizing you donated all of your garland and lights. …and when next year comes, remember to start your holiday decor shopping at your local Goodwill store.  You will be surprised what you find!

To find a list of Goodwill stores close to you, click HERE.

Stay tuned for other New Year’s Resolution tips!

Gearing up for the Holidays

I’m all wrapped up in the holiday spirit, aren’t you?  Even when I go out on the weekends, I am searching my closet for something with a little sparkle or shine. One of the HOT pieces this holiday season is the sequin skirt.

I had this outfit idea in my head that requires a gold sequin skirt.  Seemed when I wasn’t searching for one, I saw gold sequins EVERYWHERE.  Of course now, I can’t find one anywhere.  So I got busy looking online.  The one I found that seemed to be the right gold was well over $70.  This Mom’s budget can’t afford $70 for a skirt she’ll wear a few times!  Then I wondered, could I make one?

Again, back to the Google searching, and voila! Why didn’t I think of this weeks ago?  Of course…find the perfect fit in a skirt at Goodwill, and simply sequin it! 

Here are the quick and easy steps:

STEP 1
Go to Goodwill and find that perfect little skirt.  The color doesn’t matter, just make sure that the fit is exactly what you want.

STEP 2
Head to the craft store (or if you find something that is sequined at Goodwill, that might work too…rework what is already done?).  Choose a perfect color sequin fabric.  Make sure the sequin fabric has some stretch. Sequined fabric can be a little pricey, so before you hit the stores, look online for a coupon.  I found a 40% off coupon and used that…making my “holiday gold” MUCH less expensive!

STEP 3
My step 3 is a bit different than the inspiration (link below). Cut your sequined piece of fabric about1-1.5″ bigger than the “pattern skirt”.

I then used a fabric glue to seam the sides of the sequin fabric together.  I stitched the sequins at the waistband of the skirt, and only about 2″ down the sides.  This allowed the Goodwill skirt to act as a sort of slip for the sequins.

DONE!

Here is a ‘how to’:
(from: http://toothfairyfashiontale.blogspot.com/p/diy-sequined-skirt.html)

Fall/Winter Trends – Leather


Nothing says Fall/Winter like LEATHER! The thing that I think is so unusual this season, is I’m seeing more and more pleather (fake leather).  Pleather is much more affordable, and very easy to alter or re-work.
The ‘rocker chic’ look is a fun one to incorporate into your holiday looks.  Think about pairing a motorcycle leather jacket with a flirty ruffled or lace skirt.
For the office, take the same motorcycle jacket and pair it with a tweed skirt.

Thrifty Ways to Package Holiday Gifts

I love to wrap gifts creatively for the holidays and am always on the hunt for cute ideas for embellishing gifts without spending a lot of money.

You may not have thought of Goodwill as a great place to find items for adorning those holiday gifts, but it is the perfect place to check for creative gift wrapping solutions.

Here are a few of my favorite creative ways to wrap gifts for the holidays!

Wrap it In Wallpaper- I love to hunt for wallpaper when I do my Goodwill shopping because it is such a beautiful (and durable) way to wrap your gifts. Hunt for patterns that can double for your holiday wrapping and for all of those other special occasions. I can usually find huge rolls of wallpaper for a dollar or less and it lasts me forever. You can make each gift unique by switching the colors and styles of your bows and use this paper for years to come.

Use a Wallpaper Border– Wallpaper borders are also a wonderful way to wrap your gifts, particularly for the small jewelry boxes or for recovering small gift tins. The best part about using wallpaper borders for small packages is how easy it is to work with when wrapping small boxes and it costs just quarters at Goodwill!

    Upcycle a Vintage Tin– Old vintage tins can make the perfect packaging for your favorite holiday treats. Recover the tops with scrapbook paper or vintage wall paper. I also love to use cans of spray paint in bold colors for making tins monochromatic.

    Wrap it in Maps– Maps can be a really unique way to wrap those gifts. When visiting in different cities and areas, be sure to pick up some maps from the visitor’s bureau and save them for wrapping your presents. To make gifts more personal, save maps from your special trips or places that you would like to remember.
    Likewise, you can save maps from the recipient’s local area and wrap them in that. Maps can also be printed for free from places like Google Maps or MapQuest.

    Wrap them in Fabric-Look at Goodwill for great fabrics to use to wrap your gifts in over by the table linens and bed linens at the store. You can easily make a no-sew bag using hot glue and the fabric. Leave the top of the bag open and tie it up with a little bit of ribbon. This would be a great way to wrap items that tend to be more difficult to wrap because of their odd shapes.

    Make the Wrapping a Gift in Itself- Don’t forget that your gift itself can also be used to wrap your present. For example, a pretty scarf can be used to wrap a new pair of gloves or an apron can be used to wrap a new dishtowel set. Look at your gifts as wrapping elements and see how you can use them.

    Add a Small Embellishment– Add a special element to finish off your gift that you have found when doing your Goodwill shopping. For Christmas, I love to find mini-ornaments to use to decorate my gifts. For other occasions, you can tie something little that goes along with the theme of the party. Be creative and it can add another dimension to your gift.

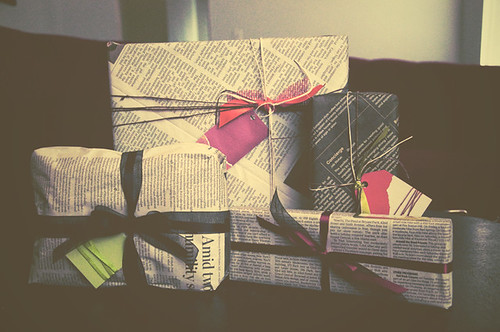
    Gifts wrapped in newspaper

    Wrap it in Newspaper- Newspaper is a great way to wrap gifts and can also be tailored to the recipient. For example, I love to wrap children’s gifts in the comics section of the paper. This is a fun and frugal way to wrap their gifts and, let’s face it; kids do not care about the expensive gift wrap anyway. Likewise, you can use different sections of the paper to go along with that person’s particular interests. For my favorite finance guy, I love to wrap the gifts in the Business section and add a Monopoly Money gift tag. Similarly, a foodie might enjoy a gift wrapped in the Food section and a whisk tied to her gift. Go nuts with the themes- it makes your gifts completely unique and more interesting to open.If you have children, have them get in on the decorating fun. Let them decorate computer paper or large sheets of construction paper to wrap your gifts in.

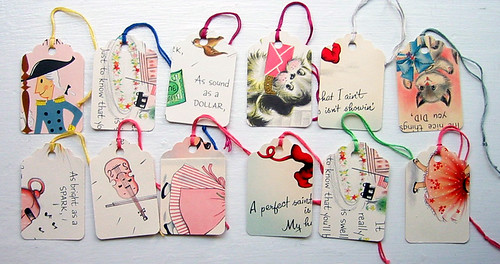
      vintage greeting card gift tags

    Repurpose Old Greeting Cards- Save the greeting cards that you receive and make new gift tags out of them. I save cards that I receive that have interesting pictures on them for these kinds of occasions. You can hole punch them and loop them through with ribbon or mount them to card stock and add an extra layer with stamps around it.

    What are some of your favorite ways to creatively wrap gifts? Have you found anything at Goodwill that you wrap your gifts with? I would love to hear your suggestions!


    Photo credits- Please click on the photos to access the photographer’s Flickr pages.