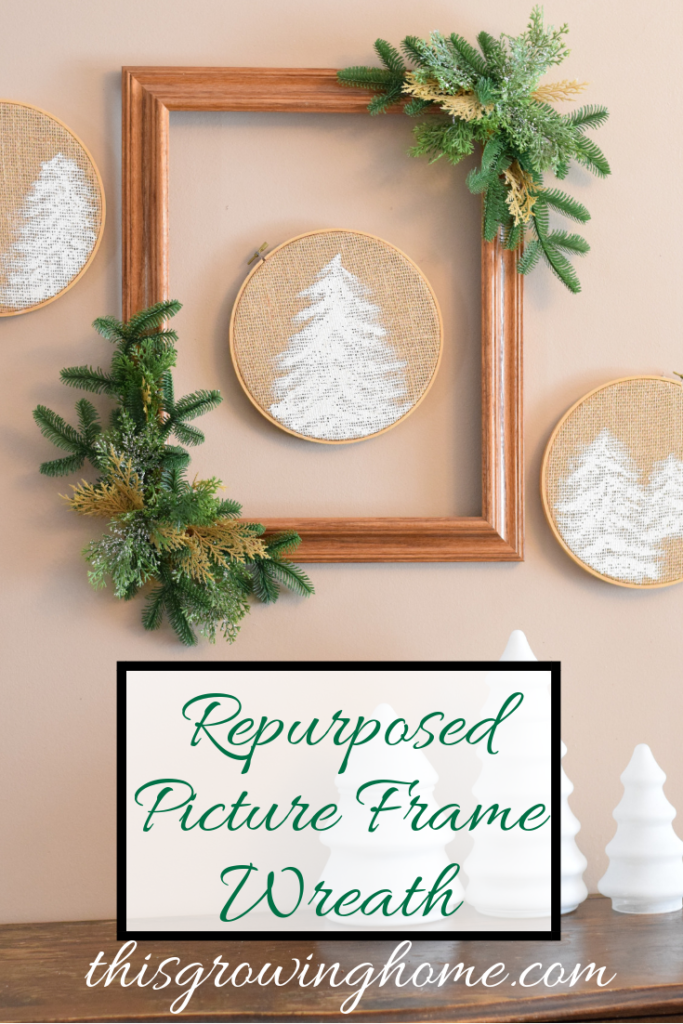
Repurposed Picture Frame Wreath

Are you ready for Christmas? This repurposed picture frame wreath is the perfect final decoration for your home, and is an easy DIY Christmas décor project using things found at Goodwill.

What you’ll need:

  1. Frames
  2. Greenery
  3. Hot Glue Gun / Glue Sticks

Supply Run!
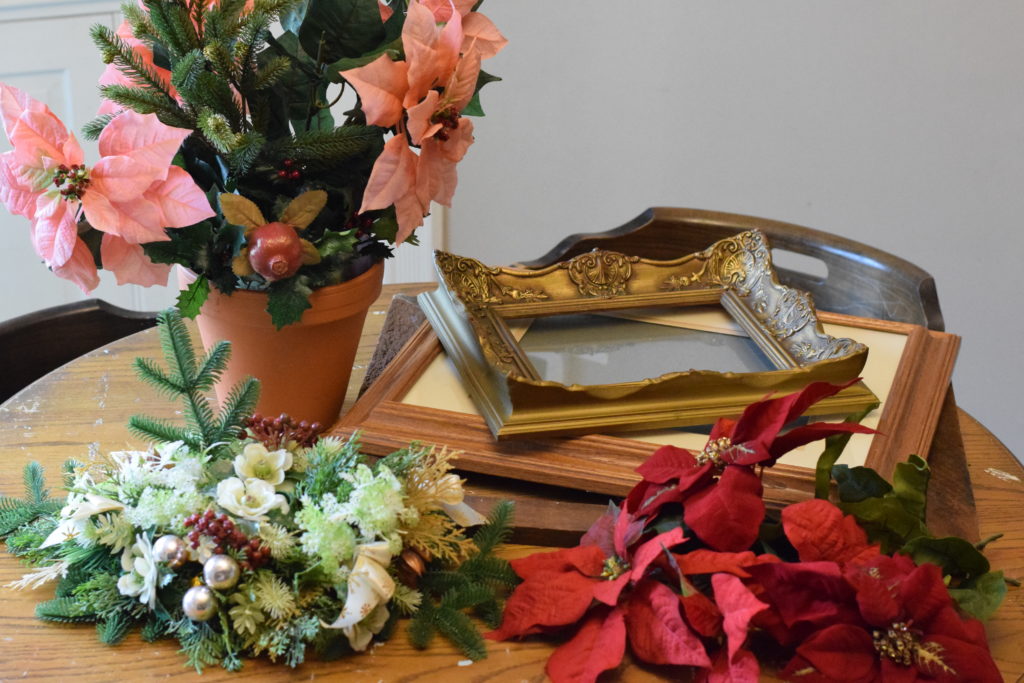
You’ll want to start out this repurposed picture frame wreath project by going on a supply run to your local Goodwill Store. They will have a ton of picture frame options for you to choose from!

Once you’ve picked out your frame or frames for this easy DIY Christmas décor project, head over to the Christmas aisle at Goodwill for some greenery. This is where you’ll need a little vision. Any donated Christmas arrangements will work as long as they can be disassembled.

Here’s What I Used

For my wreaths, I found a rustic wood frame, an elaborate gold frame, and a lighter wood frame. I also used an evergreen centerpiece, a potted poinsettia arrangement, and some red poinsettias I found on a previous trip. With those I was able to create three repurposed picture frame wreath decorations!

I preferred mine to be more minimal, and so was able to stretch the greenery farther. If you prefer a fuller look, you can easily add more to your own DIY Christmas décor project.

Pull It All Apart
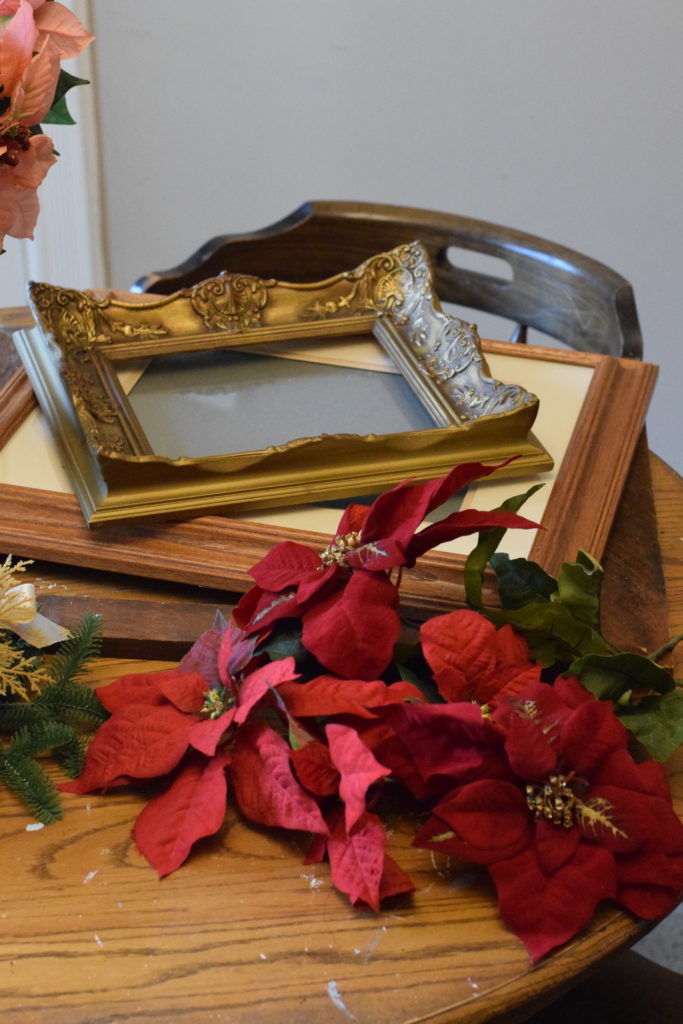
The next thing you’ll want to do for your repurposed picture frame wreath, is disassemble your supplies. Remove any pictures and glass from your frames, and separate the greenery you found.

I pulled mine apart and piled all the similar kinds together to see what I had of each. Then I organized which piles I wanted to go with each frame. Feel free to mix and match or stick to only one. Design it however you’re inspired! The beauty of this easy DIY Christmas décor project is that you can personalize it for your own preferences.

Lay It All Out
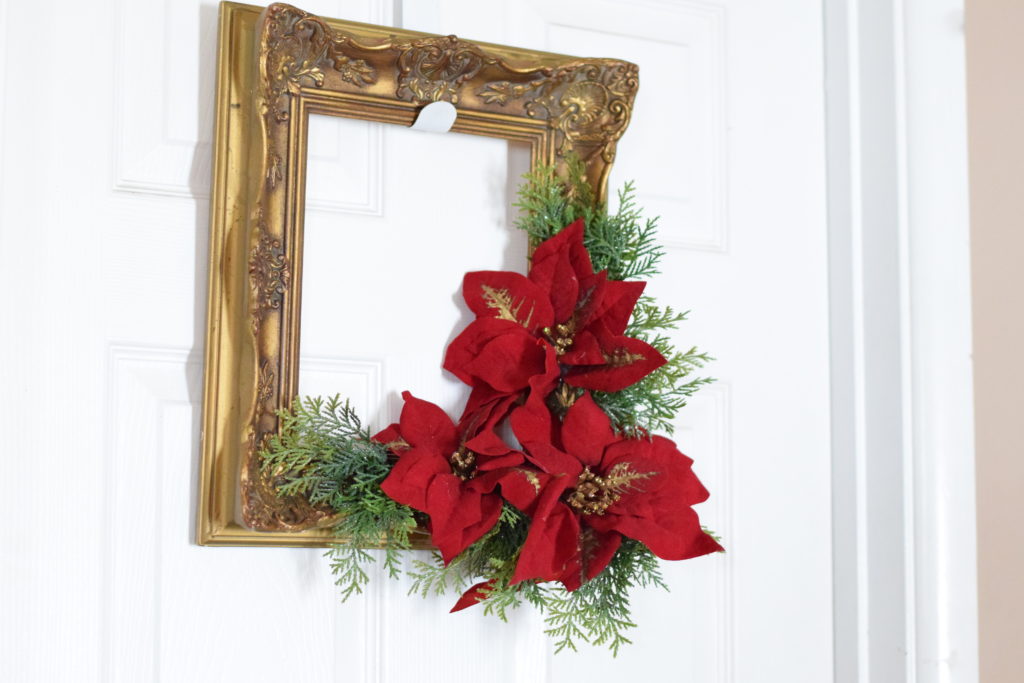
Once you’ve decided what greenery goes with each frame, you’ll want to lay it all out to make sure you have enough and perfect how it will be arranged on the frame. Find a center point that you will be working out from. For mine, I used the corner of the frame as the center point and laid it out so the greenery met at that point.

When that’s done, you can pull out the hot glue gun and get it warmed up.

Finishing Touches
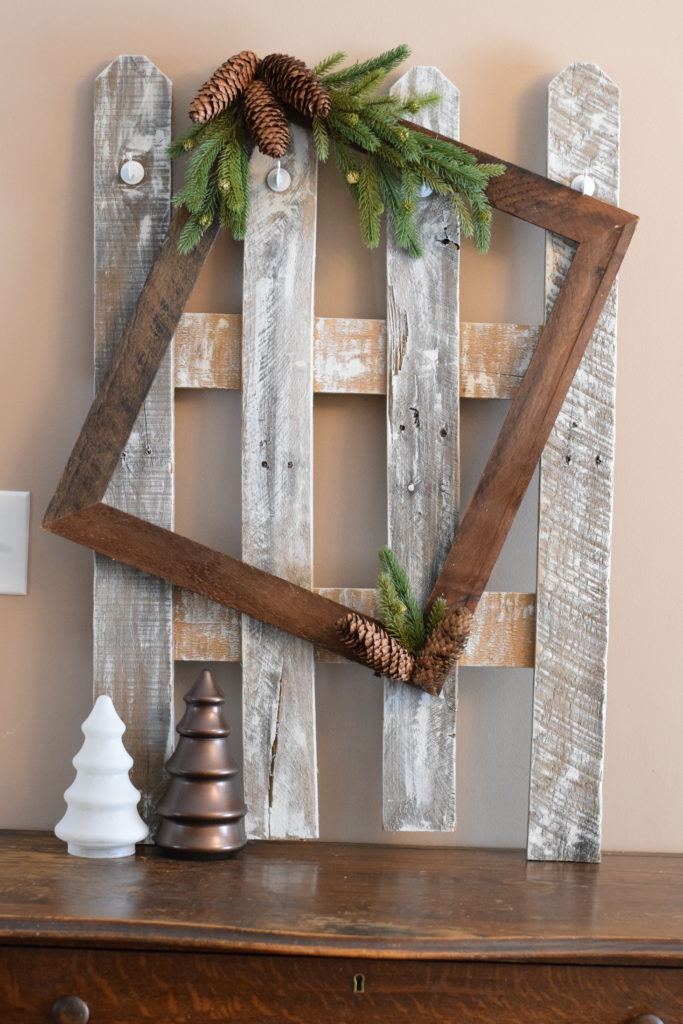
When the glue gun is all warmed up, you can start applying the greenery to your repurposed picture frame wreath. Start with the farthest greenery from the center point and work toward the center. That way, you will hide any stems or glue under the next piece. Once you get to the center, you can nest the stems and glue under pieces that are already glued down so they aren’t visible.

If you are nervous about being able to disguise the glue points, you can add your own embellishment to the center point like a ribbon or bulb. You may even have one laying around after disassembling your greenery!

Get Hanging!
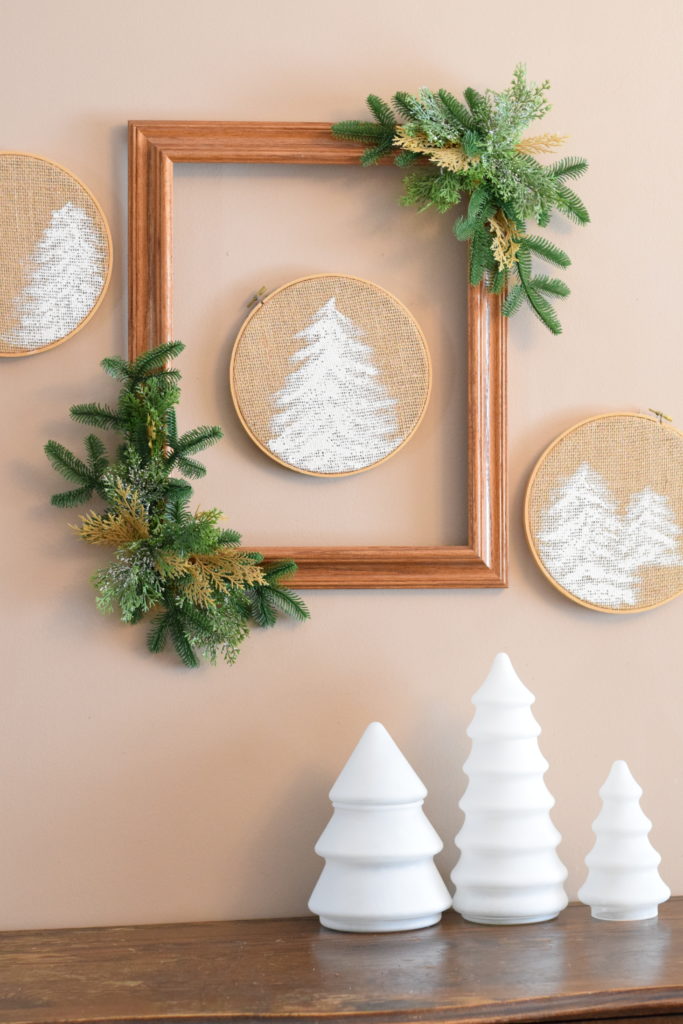
After the glue dries, your easy DIY Christmas décor is ready to be displayed! You can hang your repurposed picture frame wreath, or display it from a shelf.

I was so happy with how mine turned out! They look great on their own or as the focal point of your holiday wall arrangements! Enjoy your DIY Christmas décor pieces! You can find tutorials for the DIY Winter Décor Glass Trees and picket fence DIY Stocking Hanger on my website www.ThisGrowingHome.com

Or go directly to the posts:

https://www.thisgrowinghome.com/diy-winter-decor-glass-trees/

https://www.thisgrowinghome.com/diy-stocking-hanger/

Hopefully you enjoyed this fun and easy DIY Christmas décor project and are already getting started on your own repurposed picture frame wreath! Check in later for more fun and easy projects supplied by your local Goodwill! And… Happy Decorating!!

DIY Holiday Sparkle for your wardrobe

Nothing says “holiday outfit” more than a little (or a lot) of sparkle!  But spending that much money on something you will wear a hand-full of times isn’t a wise investment of your clothing budget.

The great looks you crave can be yours at a fraction of the cost if you are willing to get a little crafty!

DIY Brooch Necklace
Brooch necklaces are expensive.  What if I told you that you could easily make one and be the envy of all your friends this holiday season? Check this out…

The web is full of ideas on how to make your own brooch necklace.  I have tried many of these and have learned a lot through that process.  The key to making a nice looking necklace is wire. Leave it to Martha Stewart to come up with a step-by-step guide at making a fantastic brooch necklace. 

You Will Need:

  1.  A collection of brooches, pins and earrings.  Make sure they all have some element in common (all pearls, all rhinestones, all silver, a specific color, etc.).  These are good things to search for at Goodwill.  When hunting for a nice collection, be sure that the backs of the pieces are open (you will want to hook all the pieces together with wire).
  2. Wire – make sure the wire you get is specifically for jewelry. Trust me, floral wire won’t work (and I won’t admit why I know that).
  3. Ribbon – I have found that a thicker grosgrain is best, however a silk will work too. If the ribbon style isn’t for you, try a thick chain.  Find a chain necklace (that has a solid clasp) at Goodwill, and use that as the launching pad for your own design.

DIY SEQUIN or GLITTER STILLETTOS
Several years ago I met this woman who had the most amazing stilettos. I asked her where she found them, and she replied “I made them”.  This was a time before Pinterest, so I couldn’t imagine someone would MAKE something like that.

To take on the task of an entire shoe in glitter or sequins is a bit daunting, so why not try just the heels?   There is a simple You Tube video on how to do this.  Check it out HERE.

Of course if you are more confident in your crafting abilities, try gluing sequins to a full shoe.  The results will be AMAZING! 

You Will Need:

  1. Shoes with a great heel from Goodwill
  2. Craft Glue (I agree with the version in the video, it works the best.)
  3. Glitter or sequins.  Many times you can find craft supplies at Goodwill. Before heading to the craft store, be sure to look at your local Goodwill first.  You may be surprised by what you find!

DIY SEQUIN SKIRT
Sequin skirts are very trendy. The most wearable styles are those that have some sequin embellishment. Why can’t you just emblish yourself? Of course you can!

I found this great blog with lots of DIY clothing ideas.  I LOVE this sequin skirt idea.  So simple!

You Will Need:
1. A skirt. Go to Goodwill and find one in a color and style that is perfect for your project.
2. Some sequins. I have found that you can find great sequins on other things at Goodwill.  Look through the sweater asise, you might be suprised what you find!
3.  Needle and Thread.  I have also affixed embellishments with Stich Witchery. That can work if you are using a fairly large piece of sequined fabric.

Holiday Looks for Less

As I sit here in my office, looking at my event calendar for the month of December, I’m wondering how in the world I am going to be able to find amazing holiday outfits to fit all of these events.  Everything from an office cocktail party to a girls luncheon and a dinner dance. 
Rather than making the mistake most of us do this time of the year (run off and buy a few new outfits that we will wear one maybe two times), I decided to head to Goodwill and see what I could find.  First, I settled on a color: RED!  
Here is how I styled this amazing red dress, 3 ways to meet all of my holiday event needs.
THE RED DRESS – one holiday dress, 3ways
Holiday Gathering with friends-The first look I found a great vintage tapestry bag and made that the statement of this look.  With understated jewelery and boots the handbag pops! Since this event is a casual one, I grabbed a denim jacket to finish the look.

Dress:  Goodwill
Jacket: from my closet
Boots: won in a Facebook Contest
Handbag: Goodwill
Necklace: Stella and Dot
 

Office Party – Sophisticated and chic was what I was going for in this look.  I paired the red dress with a textured tight (these have a subtle stripe) and shoe-boot, a necklace with a lot of sparkle and finished the look with a scarf with some sequin detail on the ends.

Dress:  Goodwill
Scarf: Goodwill
Handbag: from my closet
Tights: from Target
Shoes: from my closet
Necklace: Stella and Dot
Bracelet: local boutique ($10)
 
Dinner Party with Dancing  – Finally, I needed something that I could wear to a dinner dance.  I changed the neutral in the outfit from black to gold.  My gold sparkly shoes are perfect for dancing.  When I added a gold statement necklace, layers of gold bangle bracelets and the vintage designer handbag…I was set!  I also threw on an amazing vintage fur jacket to finish the look.  Of course…from Goodwill!

Dress:  Goodwill
Handbag: Goodwill
Shoes: from my closet
Necklace and Bracelet: Stella and Dot

Of course to further change the look of this dress, change the belt!  In the first look try a thick black belt or a braided one.  For the second, try something with some shimmer.  And for the third try a gold chain belt.
 
STAY TUNED!
Stay tuned to this blog for some great ideas on how to add a little sparkle to your New Years outfit!

Valentine’s Day DIY Projects

Valentine’s Day is just around the corner and today I wanted to showcase some fun ways to add a little Valentine’s fun to your house using items you can often find at your local Goodwill. The best part about these  projects is that the are inexpensive and oh-so-easy to create!

Valentine’s Day Mason Jars– Mason jars are an item that you will often find in the housewares section of the store and can be used for a variety of projects. Decorate a side table or mantle with these cleverly decorated mason jars for Valentine’s Day. Hearts can be created from any red shirt or sweater you might spy and then wrapped sweetly with jute or twine. Finish this project off by adorning it with a lacy paper doily. (@ crescendoh).

If snow globes are more your thing, I adore these sweet little Snow Globe Jars that you can create for Valentine’s Day. I also love that they are inspired by one of my favorite out-of-my-budget shops, Anthropolgie (@ whiperberry)

Tunnel Of Love Art– Free printables abound and can be a fun way to dress up a wall, table, or mantle without spending a lot of money for holiday occasions. Spray paint a Goodwill frame a bold red and insert this adorable free printable in your frame for a fun nod to the holiday that sits perfectly in your budget!  (@ Flamingo Toes)

Candy Cane Valentine’s Day Treats– At Goodwill, we are all about finding new ways to repurpose items around the house and that is why I love this candy treat project so much. Don’t throw out those leftover mini candy canes just yet!  Upcycle your Christmas treats into super sweet Valentine’s Day treat pops for your kids to give out for Valentine’s Day. Have your children decorate and create their own Valentine’s this year and tuck these sweet candy cane pops in for a finishing touch. (@ Pleasant Home)

Crochet Heart Garland– If you have the talent for crochet, this adorable Crochet Heart Garland is a fun project to create to decorate a mantle or to drape over a window. Check Goodwill for items like yarn and crochet needles in the craft supplies section of your store. (@ design sponge)

Valentine’s Day Wreath– Donated wreaths are often donated at the store and can easily be updated with a few homemade additions. This tutorial for loopy felt flowers and rosettes are the perfect way to dress up a wreath in bright Valentine’s Day colors with just a few dollars in felt (@ The Motherload)

Yarn Wrapped Letters– Yarn projects are one of my favorites because they are so inexpensive to create and, frankly, I’ve got a lot of yarn in this house of mine! These yarn wrapped letters are a fun way to repurpose a ball of yarn in your home and can be created with a variety of sweet phrases for the holiday. (@ Family Chic)

Valentine’s Day Bunting– Buntings can be created from a variety of items available at Goodwill. I love to use large pieces like a sheet, tablecloth, or curtain material to create my fabric projects because they offer so much fabric for your money. Hunt for fun prints in pinks & reds to create a simple fabric bunting to dress up your mantle. (@ It’s My Story)

Fabric Painted Hearts– Fabric painting is a fun way to spice up a shirt or a bag for the Valentine’s Day season. This sweet and easy tutorial for a fabric painted heart would be a fun craft project to try on a white t-shirt for yourself or for your kids (@ V and Co.)

What are some of your favorite Valentine’s Day projects to do with your family?