11 Fun New Ways to Decorate Eggs

Easter is just around the corner and Goodwill has you covered with 11 fun new ways to decorate your eggs this year. Before you tackle these egg dying projects, be sure to check out the store for fun ways to display your beautifully dyed eggs. Goodwill offers a plethora of choices for beautiful glasses, jars, cake stands, baskets, and bowls in the Housewares department to showcase your handmade beauties!

Here are 11 new ways I have discovered to decorate your eggs this year! I have a feeling you are going to LOVE these new spins on egg dying and decorating.

Trying to create a statement? These Subway Art Eggs with Lil’ Luna are just the subway ticket! 
Why should Christmas be the only advent holiday? Tackle a countdown to Easter with a dozen eggs from A Subtle Revelry.
Do you have packets of Kool-Aid in your pantry? Put them to work with Kool-Aid dyed eggs from MomAdvice! 
Budding artists in your family? Give them a Sharpie and let them create beautifully decorated doodled Sharpie eggs from Alisa Burke.
Watercolor prints are a hot trend right now. Replicate that beauty by letting your kids create watercolor eggs with Nest of Posies. 
Do you gravitate towards a more minimalist decor? These minimalist Easter eggs are a sweet & simple nod to the season from pickles. 
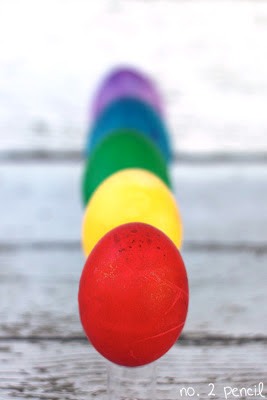
Do you prefer your eggs bright like a rainbow? These rainbow dyed eggs are vivid in hue and statement from no. 2 pencil.
Love using more natural elements in your decor? These naturally dyed Easter eggs are dyed with a variety of items you probably already have in your pantry & fridge from Two Men & a Little Farm.
Can’t choose between colors? Try this simple marbleizing technique created from pantry items from MomAdvice.  
One thing that will never go out of style is the sweetly speckled egg and you can find a tutorial for this technique over on Crafts By Amanda.
Should you be feeling a little more trendy, you can create beautiful ombre eggs in your favorite hues from Sugar and Charm.
I hope these ideas inspire you and be sure to visit your local Goodwill store for cute supplies to show off these beautiful eggs. Not only will you have a fun new nod to the season, but you will be able to do it all on a budget that fits absolutely beautifully in your life. (image source: momadvice)

What is your favorite way to dye or decorate eggs? Feel free to chime in below! 

New Ways to Save in the New Year

There is something so renewing to know that a new year is beginning and that you have a whole new year ahead of you to start fresh. In February, our New Year’s goals may have already been forgotten, but today I want to encourage you to dust those goals back off and start anew again with a goal that is very dear to my heart… being wise with our funds. The goal that I have each year is to continue to reduce our spending and find creative ways to live our beautiful life on a small budget.

Perhaps it is a goal of yours too? Let’s explore some new ways to save in this new year!

Get Your Finances Back on Track- Isn’t it funny that we have more ways than ever to be in touch with our money, yet many of us couldn’t be further from it? Consider investing in some financial planning software this year or utilizing a free financial planning service like Mint.com for tracking your spending. Start this year out right and begin analyzing where your money is going and find new ways that you can reduce your spending categories. Viewing your spending history is an eye-opening way to see simple switches you could make to begin saving and planning for your future.

Switch to a Cash System- In some regards, using an envelope system is an old-school method, but it has been the one method that has worked the very best for our family through the years. At the beginning of the week, withdraw the money that you need for your groceries and give an allowance to yourself, your spouse, and a family allowance for dining out/entertainment. This will not only keep you within your grocery budget, but it will also keep those incidental expenses for each family member within a budget too.

No one can shame you for buying a weekly latte and no one can be upset that a family member went out to dinner, provided that it is within your weekly allowance! A family allowance will also allow you to do something fun each week together and give you that much needed family time you deserve. 

Ditch the Membership Fees- Are you paying for a membership that you aren’t using anymore? Many times when I talk to people about memberships they have, they are usually not using them. Do you have a gym membership, but don’t ever go to the gym? Do you subscribe to a magazine that you don’t have time to read or is no longer applicable to that stage in your life? Do you have a movie club, but no one ever has time to watch the movies?

Ditching those memberships doesn’t mean that you can’t indulge in those activities; it just means you can be smarter about how you are doing them. A gym that offers a punch card where you only have to pay per class might be a better option if you can’t ever make it to the gym. Checking out those movies and magazines from the library might be a better way to indulge in those entertainment expenses without paying yearly on them. Rethink how you can approach those spending categories and you could easily save $30 or more off of your monthly expenses. 

Embrace a DIY Lifestyle- The best thing you can do for your finances this year is to invest in learning new skills that you will save you money. Take a class to learn how to make your own birthday cakes, learn a new craft that could save on gift expenses, visit a Saturday workshop at your local hardware store to complete a home improvement project, research on You Tube or check out books from the library on how to tackle projects that you normally have to outsource. Embracing a DIY lifestyle is what frugality, to me, is all about. Go out and learn a new skill today and see what it can do to improve those family finances. It just might surprise you!

When looking for materials for these DIY projects, be sure to stop at your Goodwill store to see what treasures you can use to tackle those home improvement projects. Goodwill is always my first stop when looking for materials for my favorite DIY projects. 

Get Rid of That Clutter- Clutter not only weighs us down physically, but clutter causes us to spend money when we don’t need to. One look at a cluttered pantry or bathroom closet and you know exactly what I am talking about. Duplicate purchases occur when we don’t have a strong grasp on our inventory in our home and clutter hides us from the real treasures that are in our lives. Stop allowing clutter to put a drain on your budget and your life.

The best part about our Goodwill stores is that not only can you get rid of clutter, but you can score savings at the store by stopping by and making that donation. An employee will happily hand you a tax receipt when you drop your items off at the Goodwill Drive-Thru Donation Center. The bonus, that makes the trip and decluttering your life entirely worth it, is that our Michiana Goodwill Stores attach a coupon to your tax deduction form that will save you a percentage on your next shopping trip.

When you visit Goodwill, ask about their Goodwill Loves Moms Reward Program.  It’s amazing!  You can register in the store for $4.00 and you’ll receive a re-useable Donation Bag and Reward Card.  When you donate with the bag, they’ll validate your Reward Card.  When the card is full, they’ll send you a gift valued at $25.00 – or a Shopping Certificate – you decide!  Find out more at:  www.GoodwillLovesMoms.com.

I call that a win-win situation when it comes to ways to save money and reward yourself in the new year!

WHAT IS THE ONE THING YOU WOULD LIKE TO CHANGE ABOUT YOUR SPENDING THIS YEAR?

Valentine’s Day DIY Projects

Valentine’s Day is just around the corner and today I wanted to showcase some fun ways to add a little Valentine’s fun to your house using items you can often find at your local Goodwill. The best part about these  projects is that the are inexpensive and oh-so-easy to create!

Valentine’s Day Mason Jars– Mason jars are an item that you will often find in the housewares section of the store and can be used for a variety of projects. Decorate a side table or mantle with these cleverly decorated mason jars for Valentine’s Day. Hearts can be created from any red shirt or sweater you might spy and then wrapped sweetly with jute or twine. Finish this project off by adorning it with a lacy paper doily. (@ crescendoh).

If snow globes are more your thing, I adore these sweet little Snow Globe Jars that you can create for Valentine’s Day. I also love that they are inspired by one of my favorite out-of-my-budget shops, Anthropolgie (@ whiperberry)

Tunnel Of Love Art– Free printables abound and can be a fun way to dress up a wall, table, or mantle without spending a lot of money for holiday occasions. Spray paint a Goodwill frame a bold red and insert this adorable free printable in your frame for a fun nod to the holiday that sits perfectly in your budget!  (@ Flamingo Toes)

Candy Cane Valentine’s Day Treats– At Goodwill, we are all about finding new ways to repurpose items around the house and that is why I love this candy treat project so much. Don’t throw out those leftover mini candy canes just yet!  Upcycle your Christmas treats into super sweet Valentine’s Day treat pops for your kids to give out for Valentine’s Day. Have your children decorate and create their own Valentine’s this year and tuck these sweet candy cane pops in for a finishing touch. (@ Pleasant Home)

Crochet Heart Garland– If you have the talent for crochet, this adorable Crochet Heart Garland is a fun project to create to decorate a mantle or to drape over a window. Check Goodwill for items like yarn and crochet needles in the craft supplies section of your store. (@ design sponge)

Valentine’s Day Wreath– Donated wreaths are often donated at the store and can easily be updated with a few homemade additions. This tutorial for loopy felt flowers and rosettes are the perfect way to dress up a wreath in bright Valentine’s Day colors with just a few dollars in felt (@ The Motherload)

Yarn Wrapped Letters– Yarn projects are one of my favorites because they are so inexpensive to create and, frankly, I’ve got a lot of yarn in this house of mine! These yarn wrapped letters are a fun way to repurpose a ball of yarn in your home and can be created with a variety of sweet phrases for the holiday. (@ Family Chic)

Valentine’s Day Bunting– Buntings can be created from a variety of items available at Goodwill. I love to use large pieces like a sheet, tablecloth, or curtain material to create my fabric projects because they offer so much fabric for your money. Hunt for fun prints in pinks & reds to create a simple fabric bunting to dress up your mantle. (@ It’s My Story)

Fabric Painted Hearts– Fabric painting is a fun way to spice up a shirt or a bag for the Valentine’s Day season. This sweet and easy tutorial for a fabric painted heart would be a fun craft project to try on a white t-shirt for yourself or for your kids (@ V and Co.)

What are some of your favorite Valentine’s Day projects to do with your family? 

Creatively Wrapping Gifts With Goodwill Items

Christmas is quickly approaching and this is the holiday where the crafter in me rejoices not only for the Christmas crafts I get the opportunity to create, but the opportunity to package those gifts beautifully under our tree. Goodwill can be a great place to check for, not only your gifts, but also items to creatively package those gifts in a unique way.

Yarn Embellishments- It is rare to stop at Goodwill and not see craft supplies that have been donated. Yarn is one of those inexpensive craft supplies that I love to use when packaging my gifts. Whether it is a yarn pom pom in lieu of a bow, multiple colors of yarn that have been woven together to create a unique packaging detail, or even knitted or crocheted embellishments can make beautiful gift toppers. (Image Source: Persia Lou)

Gift Card Snow Globes- Gift cards can often feel impersonal, but are often just what the recipient has asked for or needs. Package those gift cards creatively by vising the Housewares section at Goodwill and hunting for jars that can be used to create your very own gift card snow globes. Little ones can participate in the fun in creating these adorable craft. Look for small items to decorate the inside of your snow globe and spray paint those thrift store lids with a festive green or red spray paint to spruce it up. (Source: The Creative Mama)

Fabric Flowers- Visit Goodwill on the half off days or select items that are on sale that week to find material from clothing items that can be used to creatively embellish your gifts. Cut scraps of fabric to create homespun bows or cut the fabric into easy circles and create a fabric flower that can be personalized with unique buttons or costume jewelry for creatively topping them. Even items like t-shirts can be used to make elegant flowers for a unique addition to boxes or kraft paper gift bags. (Source: MomAdvice)

Book Page Rosettes- Book pages are the ultimate in frugal craft materials and are a fantastic resource for creating your very own gift toppers. With a simple pair of scissors and a little glue, you can top your gifts beautifully and inexpensively with rosettes made from book pages. (Source: Under the Table & Dreaming)

Beauty Gift Additions- Gifts of beauty items like sugar scrubs or bath salts can be a fun and thoughtful gift to give and made with materials in your pantry. I love to add a simple addition of a vintage spoon and package these items in a mason jar found at my Goodwill store. Find a jar you love, but can’t find a lid? Simple bands and jar lids can be found at your local discount store and freshen up a jar with a tired lid or be the perfect topper for a jar that might be missing one. (Source: MomAdvice)

Salt & Cinnamon Dough Toppers– Remember making simple salt dough ornaments or cinnamon-filled dough ornaments for the holidays? These are still a fun way to top gifts and can be made from some simple ingredients in your pantry. Grab a salt dough recipe here or look for the cinnamon dough recipe over here. Tie these on with scraps of fabric from Goodwill items. The best part about these toppers is that they later can be used as an ornament to adorn your tree. (Source: Simply Savannah Events)

What are some creative ways you love to package your gifts? I would love to hear from you! 

Throw a Board Game Party With Goodwill

I am so excited to share with you today some easy craft projects you can do to create a beautiful board game party theme for a fun game night with your friends.

I recently hosted a board game party and created all of my fun decorations from supplies I found at our local Goodwill and the dollar store. The total cost spent on all of these decorations was a mere $30 and I am so proud of how this theme turned out.

I hit our local Goodwill on a half off sale day to score these three vintage board games for a total of $2.44 (for all three)! What a steal!

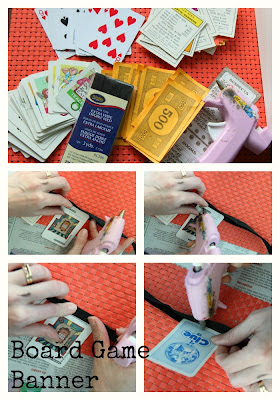
The first thing I did with my supplies was to create a board game banner to edge my party table. For this you will need board game paper cards, a deck of cards (optional), play money, extra wide bias tape (I found this at Michael’s craft store in the sewing supplies), and a hot glue gun with glue sticks.

Using your hot glue gun, add two drops of glue on each side of the front of your board game piece and secure it to the inside front of the bias tape. For the reverse, add one drop of glue and then secure again to the opposite inside of the bias tape. Repeat this in a sequencing pattern all down your banner.

I decided to create two of these, one to edge my table and one above my table on my ledge. To secure it to your table, just use safety pins or straight pins to pin it to your tablecloth. Isn’t that the cutest?

I had a lot of food to serve and not a lot of platters to use. Good thing we have those board games, right? At Goodwill, pick up three clear glass candlesticks in the same size. If you can’t find them there, you can grab them at the dollar store. Using a primary spray paint color, spray paint these with your favorite color. Let them dry for an hour.

Clean off your board game with a Clorox wipe (we will be serving food on it). Invert your candlesticks upside down because we want the wide side of the candlestick to secure to the board game to create a more stable surface. On that side, apply your hot glue all along the edge and secure it to your board game on the bottom to create a base for your serving platter. Hold it secure for a couple of minutes. Repeat this process with the two other candlesticks, creating a triangle base on the bottom of your board.

Isn’t this the cutest serving platter? By raising your food up, you will have more room to add platters below and create interesting levels to your food.

You can also use other board games without a stand to place your food on lower levels. Doesn’t that look awesome?

To add some more interest to my table, I also created hurricanes to display the smaller board game pieces. Again, you just need clear glass candlesticks or even brass ones, that are often in abundance at Goodwill. Spray paint these your favorite color and then add glass bowls or containers on top to finish them off. If you can’t find these at your store, you can also check the dollar store for small glass fishbowls and vases that can be used.

Using an epoxy glue intended for glass (I used an Elmer’s epoxy glue that I picked up from my hardware store), secure the glass bowl to the top of your candlestick (just as shown above using a hot glue gun). Fill it with you favorite vintage board game pieces from the board games you bought.

I absolutely love the vintage pieces that you can find in old board games. Just remember, these hurricanes can be reused for other parties and spray painted again in whatever your party theme colors might be.

Since I was on a spray painting frenzy and I had so many great dishes to share for this party, I also created these DIY chalkboard food label frames. You can grab the tutorial for this project as well as the recipes for all of the dishes I created for this party to replicate what was created here.

Now grab your best girlfriends, have everyone bring their favorite beverage and board game (check out this list for great games to grab at Goodwill), and have a fun board game party evening that your friends will always remember!

What happens to be your favorite board game? 

Creating Your Own Back to School Traditions


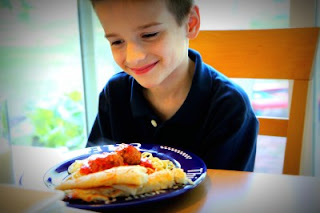
In less than one week, my two sweet kids will be boarding their bus and heading off to their first day of school. It is hard to believe that another fun summer is behind us, but if this picture offers any indication, I am just a tiny bit enthusiastic about getting back to our daily routines and having time to work without carving time away from my attention to them.

We truly have much to celebrate and be thankful for in our family – including our school milestones – and I always try to make these days as special as possible with a fun celebration dinner for the kids.


Today I want to share some easy ideas for fun school-year celebrations you’ll enjoy all year long.


Create a School Picture Tradition


I love to see how much my children grow each year and I’m always trying to think of a new way to capture this big moment in their life.

Create a sign that says what year they are going into school or search on Pinterest for free back-to-school printable signs to use for your big day. To really take your sign to the next level, visit Goodwill to find a cute picture frame to put your sign in and spray paint it for a pop of color. You could also hunt for a small chalkboard or create your own chalkboard using chalkboard spray paint and jot down their school year. 

Try to capture the big things, like that growth spurt that seemed to happen overnight, and then capture the little things like their fancy new school shoes or their cool character backpack. Even if you might have missed the moment on the first day of school, there is an opportunity to capture this all year long and no one will be the wiser that it wasn’t your kid’s first day back. I promise that these pictures will later be a treasure to you and to your kids when they can look back and see how much they have grown and changed.


Create a Celebration Plate Tradition


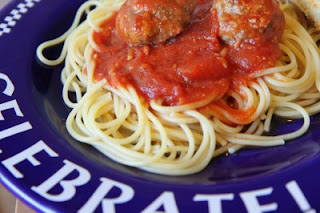
One of our wedding gifts when we got married was a Celebrate plate that my mom picked up at our local greeting card store. This tradition was handed down to me because when I was growing up, any time we had a celebration in our family, the special recipient got to eat on the special plate.

You can create your own Celebration plate that you decorate together using a plate from your local Goodwill store and a porcelain paint set that you can find at the craft store.  Use a waterproof marker pen to jot down the date and the exciting occasion you’re celebrating together on the back of your plate for a sweet tradition that can sit sweetly in your family budget. 


Create a Fun Decorating Tradition


Our balloon wreath isn’t just for celebrating birthdays anymore.  I now hang this wreath in our doorway anytime there is a celebration to be had in our house including those school year celebrations. You can make your own balloon wreath by covering a straw wreath with two large packages (of 72) balloons and attaching them with greening pins (in the floral aisle of your craft store). This wreath can be used for any of life’s little celebrations… big or small!


Create a Fun Meal Tradition


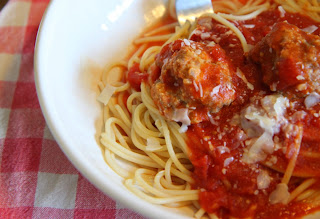
Nothing says celebration like a big plate of your favorite food. In our house, the most requested dish is my spaghetti and meatballs. When celebrations arise, whether it’s a great report card or the first day back to school, let your children make the dinner selection for the night.  We have had everything in our house requested, from our favorite sub sandwiches to a taco bar night to homemade pizza.  Not only will you not have to plan dinner one night, but the bonus is your kids will eat it and love it!

Whatever you do, I can assure you that your children will long remember and appreciate! I wish you many celebrations all school year long!

Looking for the perfect recipe for homemade spaghetti & meatballs to celebrate your kids and their first day back? I have you covered with this easy sauce and baked meatballs that rival any Italian restaurant. Double or triple the sauce and meatballs for delicious meals that you can eat all week long! 


Homemade Spaghetti & Meatballs


For Sauce:

3/4 cup chopped onion (we omitted because we don’t like onions)
5 cloves garlic, minced
1/4 cup olive oil
2 (28 ounce) cans whole peeled tomatoes, undrained
2 teaspoons salt
1 teaspoon white sugar
1 (6 ounce) can tomato paste
3/4 teaspoon dried basil
1/2 teaspoon black pepper

For Meatball (this recipe will make enough for a double batch, half to eat and half to freeze):

1/2  cup plain bread crumbs
1/2 cup chopped fresh flat-leaf parsley
4 large eggs, lightly beaten
2 tablespoons whole milk
2 tablespoons ketchup
1 1/2 cups grated Romano (or Parmesan)
1 1/2 teaspoons salt
1  teaspoon freshly ground black pepper
1 pound Italian turkey sausages (remove the casings)
1 pound ground beef

To make sauce: Saute onion and garlic in 1/4 cup olive oil until onion is translucent. Stir in tomatoes, salt, and sugar. Cover, reduce heat to medium-low and simmer one hour and thirty minutes. Stir in tomato paste, basil, 1/2 teaspoon pepper, and meatballs and simmer thirty more minutes. Gently break apart the tomatoes with the back of your wooden spoon.  Five to ten minutes before serving, add in your meatballs and then serve over a big bowl of your favorite pasta.

To make meatballs: In a medium bowl, stir together the bread crumbs, parsley, eggs, milk, ketchup, Romano cheese, and the salt and pepper. Add the turkey & ground beef, then gently stir to combine. Make your meatballs the standard size and put them on a baking sheet. Bake at 400 degrees for ten to fifteen minutes. When done cooking, drop in the baked meatballs for a few minutes. This will be just as delicious with a lot less mess and fewer calories.


Fun Ways to Celebrate the Olympics

Are you as excited as I am for the Olympic games to start? In our family, the Olympics is something to watch and celebrate together. It is an opportunity to learn about other countries, to admire amazing athletes, and a time of celebration for our country.

The Olympic games are just a week away and I am so excited to share a few fun ideas for craft and activities you can do to celebrate this exciting time.  Today I wanted to share with you seven fun activities you can try together as a family to make the Olympics extra special for your kids.

1. Olympic Medal Cookies– What could be sweeter than receiving an Olympic medal? How about an Olympic Medal filled with a cookie? AlphaMom offers this sweet little Olympic craft to do with your little ones. Stumped for a cookie idea?  I highly recommend an Oatmeal Chocolate Chip Sea Salt Cookie for your medal filling!

2. Olympic T-Shirts– Visit Goodwill to find the perfect white t-shirt to dress up for the Olympic games. with a simple painted ring pattern on an inexpensive thrift store shirt, this is a craft that is easy enough to do with kids of all ages. Kate’s Creative Space offers this fun craft idea to her readers and we think it pairs perfectly with a great t-shirt from Goodwill!

3. DIY Olympic Torch– What child doesn’t dream of carrying around their very own Olympic torch. Hoosier Homemade showcases a fun craft that you can do to create your very own Olympic torch made from some commonly found items at your local craft store.

4. Olympics Party Fun– Why not throw a party for your family or for a group of families to celebrate the Olympics? A Small Snippet has you covered with everything from patriotic foods to great Olympic game ideas to play together, to fun ideas for decorations that don’t cost a lot. Before heading to your local superstore, check Goodwill for creative games and prop ideas for your very own mini-Olympics.

5. Olympic Torches Made From Recyclables– If hitting your craft store for supplies to make an Olympic torch isn’t in your budget, this Olympic Torch from The Idea Room is made from common items you have in your home and recyclables. These torches are made from a paper plate, a paper towel roll, and red & gold tissue paper. This is one that even the smallest child can do. Be sure to lift these high and participate in your own round of fun family Olympic games.

6. Olympic Rings Necklace– Even moms can jump in on the Olympic excitement with this cute craft, from Remarkably Domestic, for an Olympic Rings Necklace. This necklace is made from simple rings covered in Chinese knotting cord to create those Olympic rings everyone loves so much. This would be a fun craft to do while watching your favorite games this year!

7. Discus Throw Frisbee– Are your kids excited about the Discus Throw? This craft from My Sister’s Suitcase is a fun one for kids of all ages. Print a design for the front of your Frisbee and then have your child decorate it to their heart’s delight.

What are some ideas you have for celebrating the Olympic games with your family?

How to Make Outdoor Living a Family Priority

School is out for summer! We are so excited to finally have time to truly enjoy the outdoors over the next couple of months..  I love nothing more than lounging around in our backyard and hitting our community pool all summer long.  Indiana winters are so long and our summers here are far too short. I really try to make the most of every moment of sunshine.

Wouldn’t we all love to just lounge around in the backyard all day with our feet kicked up? While I can’t say it will be possible every day, I want to share with you a few things we have been doing to make outdoor living a priority in our home over the years.

Chores come first. 

We all love being outside and in order for me to be able to camp out with the kids in the backyard, we need to have our indoor chores accomplished. The short list for me is to unload the dishwasher, make the beds, and swipe the bathrooms. The kids have to eat their breakfast, get dressed, and tidy up their rooms and playroom. With the promise of fun and relaxation outside, we all are more motivated to do our chores inside.

Get the dinner prep done. 

After I have finished the chores, it is time to get together whatever we will be eating for dinner in the evening. Slow cooker meals are a great alternative in the summer because they don’t heat up the house and can be pulled together quickly. If you don’t have a slow cooker, Goodwill is a great place to check for this great summer tool for getting dinner on the table without heating up the house. Likewise, marinating meats or preparing meat for the grill is another way to keep the house cool and keep one step ahead of the game in mealtime prep.

Of course, anything that you can do after your grocery shopping will also give you more time to enjoy being outside. Chop up veggies and fruits for snacking on throughout the week, cook pasta for pasta salads and keep it in a food storage bag to make a yummy cold pasta salad, bake chicken for the week to dice in tortilla wraps, for cold chicken salad sandwiches, or to toss into a pasta salad. I also love to wash and chop the lettuce for the week and use it on burgers or for a light lunch for myself or a side salad with our dinner.

Take the night off completely from dinner and roast your dinner on an outdoor fire pit instead. Children will love the novelty of cooking their foods over the fire and you will love having a night off from cooking. We try to do this a couple of times a month as a fun family night tradition.

Scale back those fancy dinners and keep things simple with grilled meats, fresh veggies, and fresh fruit. Summer is not meant to be spent in a hot kitchen so get acquainted with your grill or slow cooker so you can enjoy that beautiful weather outside.

Be prepared for outdoor excursions. 

The past couple of years, I have learned to become more prepared for those unexpected outdoor adventures. On our door hangs a beach bag that is ready to go for a fun outdoor getaway. I keep sunblock, bug spray, towels, bathing suits, and a water bottle in this bag.

Check Goodwill for a great beach tote that will fit nicely into your family budget. These totes not only come in handy for your summer excursions, but can be a great way to keep your family organized all year long.

For example, in our car, we have a collapsible bag that is filled with activities for the park. I try to keep containers of bubbles, a ball, a waterproof blanket for sitting on, a Frisbee, and a lawn chair. These activities not only come in handy for when we take a trip to the park, but they also are invaluable when visiting friends who don’t have activities/toys to keep little hands busy.

Revise your homemaking schedule with the weather. Check the forecast at the beginning of the week and try to format your schedule according to the weather. If it is raining on Thursday, make Thursday your day to clean the house. If it is sunny on Tuesday, use that day to accomplish the laundry day outside and hang your clothes on the line instead. If it is sunny all week long, then accomplish chores during your child’s nap time or after they head to bed. By revising your homemaking schedule to fit the weather forecast, you can take advantage of as many beautiful days as you possibly can.

Remember they are only young once. 
Each summer, I marvel at how much my children have grown and how quickly our time together seems to be passing. I am trying to savor these moments and for me, that means slowing down our summers. While we make big plans for summer activities, I can admit that I become selfish with my time with them in the summer. The school year will begin again and we will be back to the crazy grind of school days.

Savor these moments and revise your schedule so you can enjoy each moment of them. Seek a little shade with them. Create with them. Hop in the kiddie pool with them. Indulge in homemade slushies and popcorn every single day and blame it on “the kids” and “hydration.” Be selfish with them and their time. Treasure them.

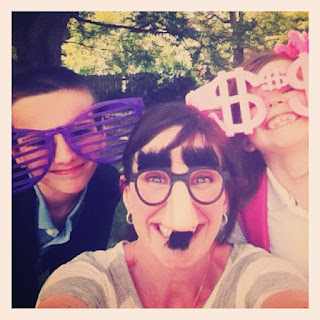
This year as they hopped off the bus on the last day of school, I whipped out silly glasses and told them that fun was the only thing this family would have on its agenda. We giggled all the way home from the bus stop. This is the stuff that makes memories.

As my husband and I say after it takes two hours to put away all the outdoor toys and clean up after the dinner, “We are making memories.”

Indeed….we are!

How do you make outdoor living a priority in your family?

Great Gifts to Give Teachers from Goodwill

As the school year draws to a close, it is a great time to think about honoring all of the hard work that your kid’s teachers have put in for your family. This past week was Teacher Appreciation Week and I couldn’t wait to deliver our fun gifts to our hardworking teachers.  Both of my children have been so blessed this school year to have teachers who love and care for them each day. It was such an honor to get to give a little love back to them for all they do.

End-of-year gifts are a thoughtful way to say thank you to your teachers who have dedicated their time to helping your children grow and learn. Here are a few of my favorite gifts to give and how you can make Goodwill a part of those gifts!

Frame a Fun Printable– Head to your local Goodwill and find a frame that you can use to frame a fun free printable for your teacher. I love to hunt for these inexpensive frames and then give them a fresh new look with a coat of spray paint.

I made these, “Raise Your Hand if You Mustache a Question,” printables for our teachers for the holidays and they loved them with spray painted red frames. They coordinate perfectly with a white thrift store mug adorned with a painted mustache.  I also really love this fabulous printable from eighteen25 that reminds the class to listen to their teachers. What teacher would not love that?

Create a Pretty Pin– This year I have become obsessed with making cute pins and have found a way to incorporate these pins on everything from bags to belts to jewelry. Teachers will love these fun accessories and it is an easy way to say thank you without spending a lot.  Pins can be created from recycled Goodwill t-shirts or you can create elegant roses from a felted Goodwill sweater or use fabric from a cute shirt you can snag on their sale rack.

Bake a Treat– One gift that I think says I truly appreciate you is spending time in the kitchen baking something special for someone you love. Visit Goodwill to find cute tins, plates, or even bake them right in the baking pans you find at your store. The best part about packaging these delicious treats with Goodwill packaging is that you don’t have to worry about getting your dishes returned back to you. I highly recommend these Dark Chocolate & Sea Salt Brownies for a treat that will knock your teacher’s socks off!  Just be prepared to have to share the recipe once they have tried them.

Give a Gift of Pampering– If there is one thing that you can find at Goodwill, it is a plethora of mason jars that can be used for all of your craft projects. Consider giving your teacher a gift to pamper herself and packaging it in a Goodwill mason jar and attach a spoon, that you can also find there.  Mix up some easy bath salts or a hand scrub that she can use to treat herself.

Give Them Something They Can Use– This year I decided to give our teachers a fun teacher supplies cake that I made with school materials I knew they might be missing in their classrooms. Check the office supplies at Goodwill to see if you can find items you can weave into a school supplies cake for your teacher. You will often find great folders, binders, and new office supplies that could easily create tiers for a cute school supplies cake to replenish their supplies for next year. Simply configure your supplies and stack them on top of each other, securing with a little packing tape to hold everything together. Half of the fun in this craft is in the creating of your cake. Adorn it with a little ribbon and a picture of your child with a thoughtful message of thanks.

What is one gift you love to create with Goodwill supplies for your teachers? We would love to hear your ideas! 

10 Unique Ideas for Projects to Do With Goodwill T-Shirts

Goodwill is one of my favorite places to visit for craft supplies and to find ideas for upcycling donated items. If you have ever been in a Goodwill store, one thing you will notice is that there is an abundance and plethora of donated t-shirts in every size, style, variety, and color.

The next time you visit your local Goodwill store, don’t just visit the t-shirts in your own size for ideas. Look in the Men’s section and in the larger sizes to find t-shirts that will offer you extra and a generous amount of craft material for the same amount of money as your smaller t-shirts. Try to select t-shirts that are not as faded or that have fabric pills on them for optimal material for your projects.

Today I wanted to share with you ten of my favorite projects that I have found to do with old t-shirts from your Goodwill store from some very amazing bloggers. I love that all of these ideas are extremely unique and that most require no sewing skills at all.

1. T-Shirt Scarves– I have seen lots of varieties of t-shirt scarves on many different blogs, but I absolutely love this DIY Dish episode you can watch to discover three different varieties of scarves you can make from an old t-shirt. My favorite is the one, pictured above, with a bright pom-pom trim.

2. T-Shirt Bibs– If you are looking for a fast sewing project that would make a fun baby gift, then these t-shirt bibs are the project for you. For little boys, you could look for their dad’s favorite sports teams and for little girls you could look for a fun t-shirt with sparkly letters or flowers. Don’t forget that these could also be embellished with rick-rack, ribbon trim, or an easy t-shirt rolled rosette flower.

3. T-Shirt Bracelets– There are many varieties of cute bracelets that I have seen using t-shirt materials, but this one has to be one of my favorites. This twisted knot bracelet can be made from just a single t-shirt or it could be made with a mix of prints or a mix of solid colors. I can’t wait to make some of these for myself and my daughter this summer. Nothing could be cozier than a gently worn t-shirt bracelet on your arm!

4. T-Shirt Produce Bag– Nothing could be greener than carrying your groceries in a cloth grocery bag…until you start using recycled materials for your bag. Even if you are a beginning sewer, this simple produce bag can easily be created for a visit to the grocery store of your local farmer’s market. I think these would be fun to make in a variety of pastel colors or to give as a gift to someone special in your life.

5. T-Shirt Pom Poms– Looking for a fun way to dress up your home for the warmer months? I absolutely love these adorable t-shirt pom poms for a fun way to add a pop of color to your mantle, as a fun adornment to a wreath, or hung in a gathering on a door handle or front door. The best part about this project is that no sewing skills are required for this one!

6. Petal Tees– I have seen many, many refashions of old t-shirts, but I think this Petal Tee is simply genius because the petal trim on this t-shirt is made from a variety of t-shirts, adding a cute pop of color for the Spring. Visit Goodwill on their half off days and stock-up on a fun mixture of colors for a fun addition of color to your wardrobe. If you are looking to add a little of the fluorescent color trend to your wardrobe, this would be a great way to do it without having to commit to an entire fluorescent piece!

7. T-Shirt Yarn– My favorite craft in the world is knitting and I love the idea of using Goodwill t-shirts to create fun yarn for my projects. This would be a fun gift to give to a friend that knits or crochets. If you can use a pair of scissors and cut in a relatively straight line, then you can do this craft and use this yarn for a variety of projects!

8. T-Shirt Aprons– I have a true affection for aprons and have a little collection of my own thrifted aprons that I have acquired from Goodwill and other antique shops. I had never thought to use t-shirts to create aprons, but I think this t-shirt apron is the cutest thing I have ever seen. This would be a cute craft to make for yourself or for your helpers in the kitchen. The best part? No ironing required and it can handle the messes that you might make in the kitchen.

9. T-Shirt Necklaces– I love t-shirt necklaces for adding a splash of color to your neckline. This rolled rosette t-shirt necklace is a fun way to add some feminine details to your outfit very inexpensively. I think it would be cute to make the t-shirt bracelet in a coordinating color and one Goodwill t-shirt should more than cover both of these cute projects.


Our tenth project is actually a fun t-shirt project we did here on the Goodwill blog. Be sure to visit my tutorial on creating a cute t-shirt flower pin made from an old t-shirt and spray painted clip-on earrings. This is so cute and would be a fun addition to a Spring top or jacket.


What are your favorite craft projects to do with old t-shirts?


All photos featured in our collage were gathered from the blogs that were featured. Please visit these blogs for tutorials and instructions on completing these projects!